Showing posts with label Commercial Roofing in Atlanta Ga. Show all posts

Monday, April 24, 2023

What is a Parapet Wall – Definition and Purpose

Parapet walls are vertical treated or flashed extensions of a roofing system

Need help understanding why there is a wall around your structure’s roof? Knowing why parapet walls are necessary and what they do will help you better appreciate their cost and maintenance.

atlantacommercialroofingcontractors.com gathered essential information about what a parapet wall is, the types of parapet walls, why they are built around a roofing system, and how they drain water from a roof.

What is a Parapet Wall

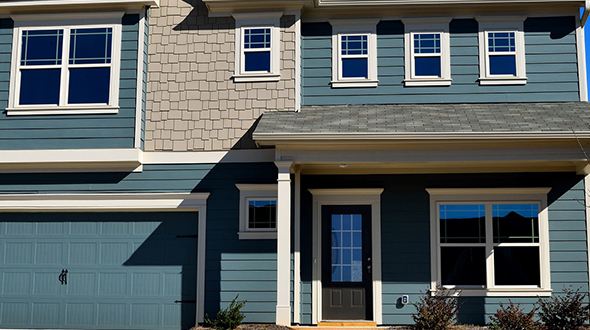
Parapet walls are typically short and thin walls constructed at the edges of a building’s roof, preferably around its perimeter. A parapet wall can be constructed as a balustrade or other architectural shapes. Parapets can also be found in houses, bridges, walkways, balconies, and other elevated surfaces.

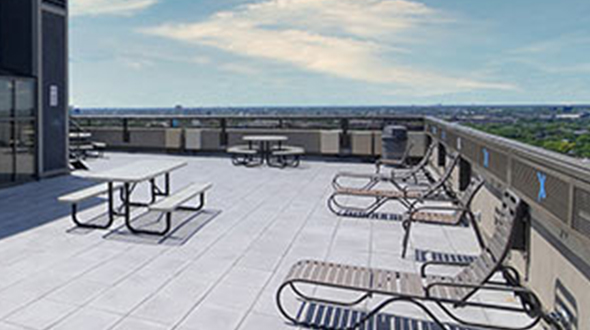
Parapet walls are principally found on flat roofs, extending the vertical wall at the side of a house or building past the roofline. They’re usually required when you want the roof to double as a terrace, balcony, facilities area, or walkway, helping to keep the area as safe and protected as possible.

Types of Parapet Walls

Parapet walls can be paneled sloped embattled plain or perforated

A parapet wall can be constructed using materials like reinforced cement concrete, brick, steel, aluminum, glass, etc. Consider the following:

Plain Parapet Walls – These are nothing more than a vertical extension of the wall at the edge of a roofing system. It is a general type of parapet wall specifically designed and constructed for safety concerns.

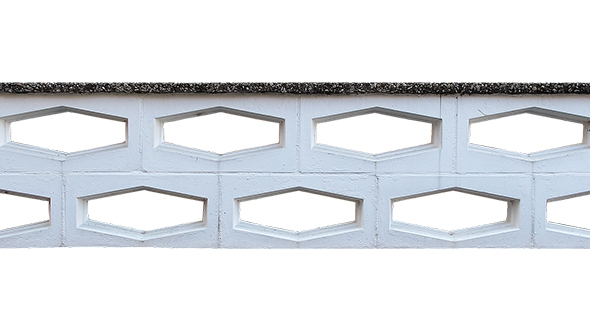
Perforated Parapet Walls – A perforated parapet wall is also an extension of the wall like a plain parapet, but the extended wall portion is perforated with different-sized and shaped openings complimenting the aesthetic appearance of the structure.

Embattled Parapet Walls – These parapets harken back to the olden days, especially used for castles, forts, etc. Alternative low and raised portions and strategic perforations are provided in the parapet. Archers typically used these perforations to shoot arrows through in a castle’s defense.

Note: Their beautiful appearance and uniqueness have them being constructed around modern structures to enhance their aesthetic appeal.

Paneled Parapet Walls – These parapet walls are similar to plain parapets but are ornamented with panel designs on the outside of the parapet wall.

Sloped Parapet Wall – Sloped parapet walls are used for sloped roof structures like industrial constructions, trussed structures, etc.

Stepped Parapet Wall – These parapet walls are also used for inclined roofing systems. The parapet wall is typically built in a staircase-type (step) design.

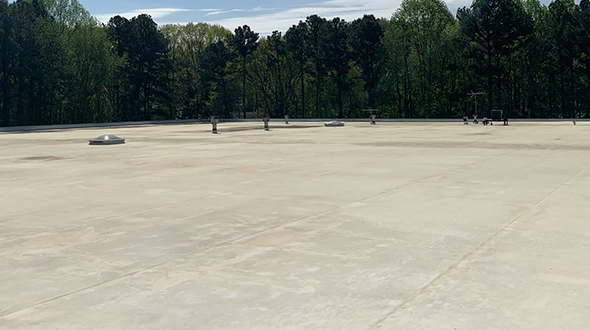
Flat Parapet Wall – Flat parapet walls are typically recommended for flat roofs.

Arched Parapet Wall – Curved or arched parapet walls are recommended for flat and inclined roofs.

Parapet walls have multiple significant purposes, including the following:

  • To prevent dust and debris from collecting on the rooftop or getting into the HVAC system.
  • To prevent any gathered debris on the rooftop from falling.
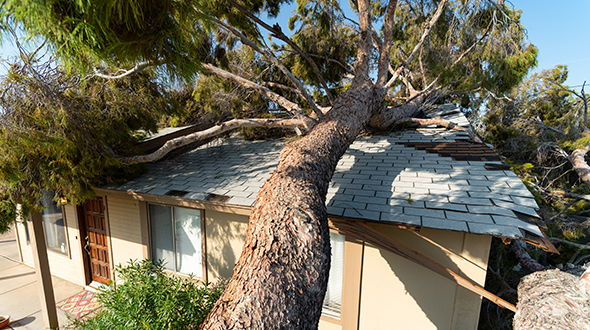
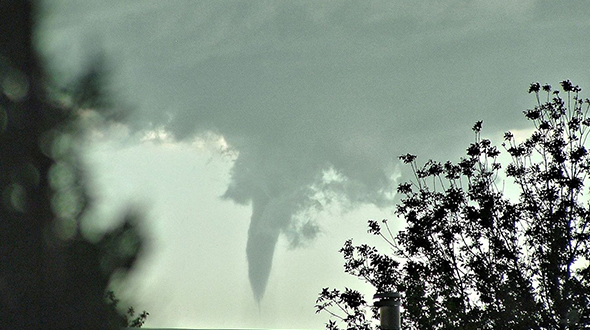
  • To avoid high wind loads from severely impacting or damaging the enclosed roofing system.
  • To provide an aesthetic look to a structure, typically increasing its curb appeal.
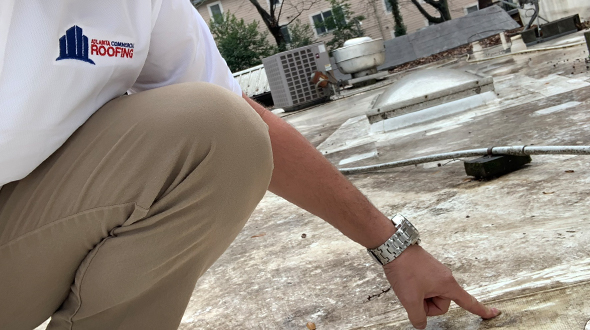
  • Sufficiently tall parapet walls provide permanent safety protection for people when on a rooftop (inspections, maintenance, and equipment servicing) and on bridges to keep vehicles from falling or driving off the bridge.
  • To hide and prevent any equipment or machinery from ruining the structure’s aesthetics or falling off the rooftop.
Parapet walls protect people from plummeting off a roof

Note: Parapet walls are typically part of a structure’s original design.

How Do Parapet Walls Drain?

Scuppers. Roof scuppers are rectangular outlets in a parapet wall at a roof’s edge that function as a drainage device. Scuppers allow water to freely drain through an opening in a roof’s edge and are one of the most common and effective ways flat roofs drain.

Note: Scuppers are typically used in conjunction with gutters and downspouts to divert water to a desired location.

Parapet Wall

In this article, you discovered what a parapet wall is, different types of parapet walls, and how they protect a roofing system and people.

Understanding why your roof requires a parapet wall will help you better appreciate the associated construction cost and maintenance.

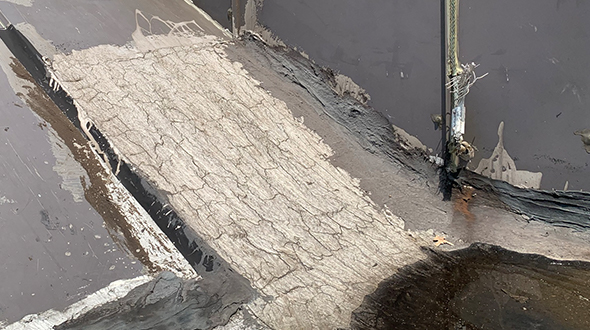
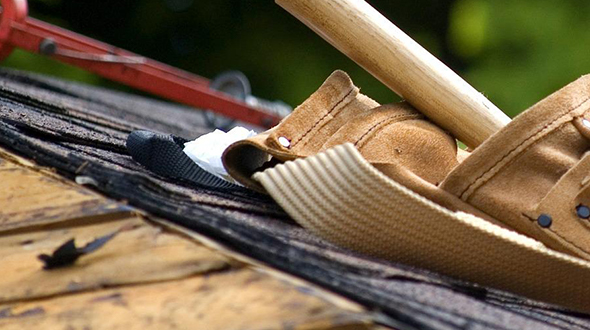
Improperly installed and maintained parapet walls can create a severe hazard for anyone on your roof, permit extensive wind and storm damage, and prevent your roof from properly shedding water.

Sources:
cdc.gov/niosh/docs/2014-108/pdfs/2014-108.pdf
osha.asu.edu/Resources/Documents/NIOSH2014-108.pdf
ehss.vt.edu/programs/FAL_general.php
copper.org/applications/architecture/arch_dhb/arch-details/gutters_downspouts/scuppers.html

Atlanta Commercial Roofing Contractors

Atlanta, GA
(404) 220-9288

The post What is a Parapet Wall – Definition and Purpose appeared first on atlantacommercialroofingcontractors.com

Monday, February 20, 2023

Everything You Need to Know about Roof Ventilation

Roof or attic vents are essential to removing hot air from the roofing system

Need help figuring out if your roof or attic has anything to do with why your home overheats during sunny, hot days? Understanding why your roof’s ventilation is crucial to its lifespan and your home’s comfort will help ensure it is properly ventilated.

atlantacommercialroofingcontractors.com gathered essential information about roof ventilation, what it is, and why it is a necessary component of your roofing system.

What is Roofing Ventilation?

Roof ventilation is a combined system of intake and exhaust vents providing air circulation to keep the atmosphere inside a home comfortable. Without adequate in and out passages in roof ventilation, hot air gets trapped within your home, causing multiple problems for your property (especially its roofing system).

How to Ventilate a Roof

Roof vents are typically installed at a roof’s peak, where the internal air rises naturally. Adding roof vents to your attic ensures warm, moist air can escape, preventing heat buildup and condensation. Like other roof components, you should periodically check your roof vents to ensure they are debris free.

How Many Roof Vents Should a House Have?

Roof or attic vents are typically spaced to accomplish sufficient ventilation

As a general guideline, your roof needs one square foot of vent for every 300 square feet of ceiling space (if your roof has a vapor barrier). If not, your roof should have one square foot of vent for every 150 square feet of ceiling space.

What Happens When a Roof is Not Ventilated?

Poor or non-existent roof or attic ventilation can cause attic temperatures to reach or exceed 150 degrees in summer. These high temperatures can lead to damaged shingles and other roofing materials, a buildup of condensation, and mold or mildew development. Some signs that your roof is improperly ventilated include the following:

  • Excessive moisture in the attic
  • Excessive temperatures inside your home
  • Visible (often premature) roof damage from moisture
  • Ice dams form in the winter months
  • Visible damage from moisture inside the home
  • Dry rot of roofing components

A maintenance program, including periodic roof inspections, can help you detect these issues early or prevent them altogether.

Tip: Contract a professional roofer to ensure that your roof’s ventilation is installed properly and is functioning as it should.

Should I Cover Roof Vents in the Winter?

No. You should leave your roof vents open during the winter months. During the winter, roof ventilation works to keep temperatures even. Closing your roof’s vents makes the attic space too warm and dry – dangerous conditions favoring mold and pests.

Can Rain Come in Through Roof Vents?

Yes. Some roof vents sit flat to the roof, with a “mushroom” hood and unprotected sides. On occasion, hard driving rain with strong wind will cause roof vents to leak. If your roof vent leaks during severe rainy weather, the rain may be wind-driven under the hood and into the vent.

Are Powered Roof Vents Worth the Investment?

Yes and no. While powered attic ventilators can offer some relief in the summer, how they do it is often not ideal or cost-effective. They can steal air from the home’s conditioned space, forcing air conditioning units to work harder, use more energy, and significantly increase utility bills.

Roof Vent Types

Metal roof vents are essential to cooling a structures attic space

The best roof ventilation systems extend the life of your roof and help lower your home’s energy bills. Different roof vents are more effective than others, but each type of vent has the essential task of either removing air from your attic (exhaust) or bringing fresh air in (intake). Consider the following roof vent types:

  • Ridge vents (most common exhaust)
  • Soffit vents (most popular for intake)
  • Off ridge vents
  • Roof turbines (whirlybird ventilation)
  • Box vents (louver vents)
  • Gable vents
  • Hard-wired (powered vents)
  • Solar-powered vents
  • Cupola vents

Roof vents are typically classified as exhaust or intake vents. Consider the following:

Exhaust Vents – Because hot air rises, exhaust vents are typically placed towards the roof line’s top. The most common exhaust vents used for modern roofing systems are ridge vents.

Intake Vents – Cooler air comes into your attic through intake vents placed lower on the roof line than its exhaust vents. Because cooler air enters underneath hot air (and because hot air rises), intake ventilation helps push hot air out of the attic.

Soffit vents are used to allow cooler air to enter attic space

How Much Does Roof Vent Installation Cost?

Roof vent installation costs can range from $300 to $1,000 (labor and materials). Prices may vary depending on the type of vent and if it is installed during or post-roof installation.

Tip: As material pricing is subject to supply and demand, inflation, etc., consult your professional roofer for the most current material and labor pricing.

Roof Ventilation

In this article, you discovered essential information on roofing ventilation and why it is necessary for your roofing system’s longevity and ability to maintain cool temperatures in your home.

Knowing why roof ventilation is so crucial will help you ensure it is installed correctly, extending your roof’s lifespan and causing less demand on your air conditioning system.

Allowing your roof to go improperly ventilated will result in damaged roofing material, a buildup of condensation in your attic, and intolerable temperatures in your home.

Sources:
energystar.gov/campaign/seal_insulate/do_it_yourself_guide/about_attic_ventilation
fema.gov/sites/default/files/documents/fema_p-737-vents-technical-fact-sheet-8.pdf
advancedenergy.org/2019/10/01/are-power-attic-ventilators-smart-to-use/
iibec.org/attic-ventilation-101/

Atlanta Commercial Roofing Contractors

Atlanta, GA
(404) 220-9288

The post Everything You Need to Know about Roof Ventilation appeared first on atlantacommercialroofingcontractors.com

Wednesday, December 14, 2022

Common Roofing Problems in Winter

Winter roofing problems include snow and ice buildup

Prevent the harsh winter season from causing roof damages and costly problems. Knowing what challenges your roofing system can endure during the coldest months will help you take action to avoid them.

atlantacommercialroofingcontractors.com gathered information about some of the most common winter roofing problems and how to prevent them.

Roof Problems in Winter

To keep your home in its best condition through this and upcoming winter seasons, be mindful of the following winter roof problems and how to prevent them:

Condensation – Condensation occurs when water droplets form as warm air hits a cold surface. This typically happens in poorly insulated attics where the roof is colder than the air inside. Condensation causes damaging dampness and mold, leading to severe damage and dangerous weakness in the roof.

Prevention: Keep your attic well-ventilated and well-insulated to reduce the risk of condensation accumulation. 

Ice Dams – Ice dams are among the biggest dangers to your roof’s structural integrity due to their weight and typically leaking into your walls. These dams sit along the edge of your roofing system and its gutters, accumulating immense weight and pressure on the area. 

Ice dams are caused when snow melts at the top of your roof and runs down to the edge, where it refreezes. Poor attic insulation is often the cause as heat escapes through the roof’s top. 

Prevention: Keep your attic well insulated. You can also limit ice dam formation by removing accumulated snow from your roof and keeping your gutters unobstructed. 

Winter roofing problems include ice buildup

Icicles – Like ice dams, icicles occur when water thaws, runs down your roof, and refreezes as it moves over cooler lower sections. Water should run into gutters, but when they are obstructed, overflowing, or frozen, icicles can quickly form on their edges, posing a threat to anyone walking below.

Prevention: Make sure your attic space is well insulated and keep your gutters clean and functioning.

Leaking Flashing – Flashing can separate from a roof’s edge or around a chimney for many reasons (storm damage, ice accumulation, etc.). When your roof’s flashing isn’t watertight, water and ice can find their way into the roofing materials and your structure.

Prevention: Inspect the flashing’s condition in the fall and periodically throughout the winter. This way, you can spot any potential trouble or damage before it becomes a leak.

Wildlife Damage – Animals can cause incalculable damage if they get inside your house. Small holes in the roof or attic can grant rats, squirrels, and birds access. Once in your attic, these creatures may establish a nesting area and severely damage the interior or significantly widen entry points.

Prevention: Keep small animals out by frequently inspecting your attic and roofing system for small holes. Seal gaps and ensure tree branches are pruned at least six feet away from your roof.

Tree Damage – Winter storms and severe weather can critically damage any trees near your home, causing hazards like falling branches and trees falling entirely; it’s crucial to inspect trees for decline, disease, infestations, and potential weakness. 

Prevention: Have a professional tree service inspect your trees and take preventative actions (pruning or removal) to reduce the risk of catastrophic roof damage. 

Debris in Gutters – Dirty or blocked gutters stop rainwater from flowing off your roof and down the drain, and can be attributed to several of the items we’ve discussed in this article.

Prevention: Keep your gutters cleaned and debris free throughout the year and in winter.

Winter Storm Damage

Winter roofing problems include damage from hail storms

Roofs can suffer the worst conditions with strong winds, heavy snow, and hail (common in winter storms). Establish a maintenance contract with your roofing company that includes seasonal inspections, minor repair work, and emergency evaluations to ensure your roof will stay strong in winter storms.

Note: Snow might look innocent enough, but when it builds up, it carries tremendous weight. For weakened or leaking roofs, heavy snow puts your home at risk of significant damage. 

If your home is old, it might be time to check if you need a new roof altogether. To keep your roof stable throughout winter, it’s best to remove heavy snow as quickly as possible. 

What temperature is too cold for a roof?

A properly installed roofing system can easily withstand prolonged periods of sub-zero temperatures. However, roof installation or repair should only be done when temperatures are 40° F (4° C) or above. Adhesives used in most modern roofing materials require warmer temperatures to properly activate.

How Many Years Should a Roof Last?

The average lifespan of a roofing system typically ranges between 25 to 50 years. However, a roof’s life expectancy depends on the following:

  • The quality, durability, and type of roofing material
  • The quality of its installation
  • The frequency of inspections, seasonal maintenance, and repairs

Tip: A well-maintained roofing system can outlive its life expectancy by decades.

Cold Weather Roofing Problems

In this article, you discovered information and tips on some of the most common winter roofing problems and what you can do to prevent them.

Being proactive with your roofing maintenance and repairs will help you get through the winter months without incurring severe cold-related damages to your structure’s roofing system.

Ignoring the need to take preventative measures with your roofing system can result in costly and avoidable damages and potentially lead to catastrophic roof failure.

Sources:
bct.eco.umass.edu/publications/articles/preventing-ice-dams/
sites.psu.edu/socialtrends/2022/11/16/is-your-roof-properly-maintained/
extn.msu.montana.edu/magazine/articles/4450
cpb-us-e1.wpmucdn.com/blogs.cornell.edu/dist/9/8787/files/2019/07/Attic-condensation.pdf
extension.psu.edu/winter-damage-to-trees-and-shrubs

Atlanta Commercial Roofing Contractors

Atlanta, GA
(404) 220-9288

The post Common Roofing Problems in Winter appeared first on atlantacommercialroofingcontractors.com

Friday, November 11, 2022

9 Common Roofing Problems and Solutions

Roofing problems can include leaks and bad repair jobs

Avoid overlooking roofing issues that can be resolved and leaving yourself vulnerable to roofers preying on your ignorance. Knowing the more common roofing problems and how to fix them will help you get the repairs you need.

atlantacommercialroofingcontractors.com gathered the following information about 9 of the most common roofing problems and how to repair them.

1. Roof Leaks

A roof leak is typically a sign of a more substantial problem. Danger and the probability of structural erosion increase if the leak is left unaddressed. Regular inspections are the most effective defense against a leaking roof. Be vigilant, search for leaks (and signs of leaks), and regularly communicate with your contractor about your concerns and the roof’s condition.

Solution – Typically, roof leaks are detected only after they have caused moderate or considerable damage to a home. This is one factor that makes roof leaks among the costliest roofing issues for property owners. Act preventively and be proactive in keeping your roof in good shape by scheduling regular inspections by your trusted roofing professional.

2. Chimney Crickets

Crickets are crucial to your chimney and roof’s integrity and longevity. They efficiently channel water and debris off the roof and into your gutters. Due to their stature, chimneys naturally attract water.

Solution – The cricket is part of your chimney’s flashing system that prevents your roof from leaking. Every chimney has different wall veneers like brick, stone, siding, or stucco, and each must be flashed differently to protect the roof. Proper flashing and a well-installed cricket are required to prevent leaks and cause the roof decking wood to rot from repeated water intrusion.

Find further reading on chimneys at atlantacommercialroofingcontractors.com/chimney-leak-repair/

3. Poor Roof Installation

Roofing problems can include poor installation and repair

A properly installed roofing system will uniformly weather. With an improperly installed roof, you’ll see different colored shingles, missing drip edges, or vents that were reused instead of replaced. You’ll also detect a stark difference in how some areas of the roof age compared to others.

Solution – Make sure the roofing contractors you hire have an excellent track record and will provide you with top-quality roof installation. To avoid being left with a bad roof installation, thoroughly vet the roofing company you choose to hire.

4. Tree Impact

When a tree falls and lands on your roof, it will cause structural roof and building damage. However, as minutes pass, your roof’s structural integrity can weaken and fail, causing the roof to eventually cave in, resulting in further structural damage and potentially life-threatening injury to you and your loved ones.

Roofing problems can include fallen trees

Solution – Act as quickly as possible to prevent any further damage from occurring (putting a tarp over the damaged roof and boarding up any shattered windows, etc.). Use a tarp or other waterproof covering to temporarily cover any openings. Your failure to mitigate further damage may negatively affect your insurance claim.

Tip: Call your insurance company immediately for instructions. This will help you preserve your insurance policy and coverage.

5. Freeze Damage

Snow and ice damage your roofing system by repeatedly thawing and refreezing as temperatures fluctuate. When snow and ice melt, water infiltrates small holes or gaps in your roof. When temperatures dip and that water refreezes, it expands, widening those holes and allowing more water through.

Solution – Getting rid of “ice dams” for good is relatively easy. You must maintain the roof at the same temperature as the eaves. You can do this by increasing attic ventilation, adding insulation, and having your roofing system inspected for air leaks that may unevenly warm the underside of the roof.

6. Pooling Water (Ponding)

Even the slightest ponding can have serious repercussions on your roofing system. The water’s excess weight may cause severe structural damage to the building, especially if the added weight exceeds the safe weight the structure can carry. Even if it does not, increased weight can stress roof trusses and other crucial building components.

Solution – The easiest way to prevent water from ponding is to routinely clean the roof’s drains, rain gutters, and downspouts. Removing debris like leaves, sticks, and branches allows water to flow freely from the roof. If you do not personally want to clean your roof, get a roofing maintenance program service to do so for you.

Tip: Regular roof and gutter cleanings are a great time for a routine inspection. If the cleaning is done by your roofing contractor, they can check and prevent small issues from becoming costly problems.

7. Roof Flashing

Flashing protects the most vulnerable parts of your roof, and any damage to this flashing is concerning. When flashing cracks, fails, or is bent upward, moisture can run inside the roof seams. This poses a significant problem during severe weather.

Solution – Typically, professional roofers will replace all step flashing on a new roof. Your roofer should not layer any new flashing on top of old flashing (this should have been removed and discarded). There should only be one layer of flashing on a roof at a time.

8. Broken or Missing Shingles

If your roof has one or more “seams” exposed to the elements, they may let in water. Other critical roof components include valleys or areas where two low parts of the roof’s structure meet. Losing a shingle at a low point can result in water and debris collecting, significantly increasing opportunities for leaks.

Solution – If a shingle is cracked or torn, you don’t necessarily have to replace it; repair it. Apply a thick bead of roofing sealant under the crack, press the shingle down and apply another bead of sealant on top of the crack. Then evenly spread the sealant with a putty knife.

Note: If your roof only needs a few shingles replaced or minor patches made, you can do it yourself or schedule a roofer to make those minor repairs for you.

9. Membrane Tears and Punctures

Roofing problems can include membrane punctures

The most frequent problems with single-ply membrane roofing systems include punctures, tears, and seam failures. Single-ply membranes can eventually shrink, become brittle, and lose their elasticity; these factors apply irregular stress on the membrane’s seams, resulting in failure.

Solution – Any hole or seam separation in a single-ply membrane can be quickly located and patched or resealed by a certified roofer.

Commercial and Residential Roofing Problems

In this article, you discovered nine of the most common roofing problems and how to get them quickly fixed.

The more you know about how roofs can malfunction and how they can be repaired will help you prevent more severe damages and potentially extend your roofing system’s lifespan.

Not knowing how your roof can be damaged and fixed, can leave you vulnerable, and paying for repairs and a replacement that may have been avoided.

Sources:
ccpia.org/why-low-slope-roofs-fail/
floridapace.gov/6-signs-of-roof-damage/

Atlanta Commercial Roofing Contractors

Atlanta, GA
(404) 220-9288

The post 9 Common Roofing Problems and Solutions appeared first on atlantacommercialroofingcontractors.com

Wednesday, October 12, 2022

Advantages and Disadvantages of a Cool Roof

There are many advantages and disadvantages to installing a coll roofing system like reduced energy bills and extended roof life

Prevent not knowing the pros, cons, and whether a cool roofing system is right for your next roof replacement project. Knowing how cool roofs can benefit your structure will help you determine which roofing system to choose when the time comes.

atlantacommercialroofingcontractors.com gathered the following information about what a cool roofing system is, its advantages, and disadvantages.

What is a Cool Roof?

A cool roof (made of a material or has a coating that can lower the roof surface temperature) is designed to reflect more sunlight than a conventional roof, absorbing significantly less solar energy. A roofing system with these properties naturally lowers a building’s temperature, just as wearing light-colored clothing can keep you cool on a warm, sunny day. Conventional roofs can reach extreme temperatures of 150°F or more on a summer afternoon, while cool roofs average 50°F less.

Does a Cool Roof Really Work?

Yes. A cool roof reduces summer energy usage, saving you significant money, and will also stabilize the temperatures in your unconditioned spaces (garage or spare room). Installing a cool roof is most beneficial in warm climates, where the winters are mild, and structures rely less on the inherent heat gain traditional roofing systems provide.

Cool Roofing Systems Vs. Global Warming

Cool roof reflective surfaces can deliver high solar reflectance and high thermal emittance. On a global scale, reflective surfaces are essential to daytime cooling, which has been proposed as a partial solution to global warming. The most well-known type of reflective surfaces in construction are those of cool roofs.

However, recent research observed the net global warming for light-colored surfaces rather than the effect on a single building or small area. This analysis discovered that white or reflective roofs contribute to global warming rather than reducing it.

That’s because such surfaces initiate a chain reaction that increases the amount of sun a city receives. The reflective surfaces reduce the vertical transport of moisture to the atmosphere, restricting cloud coverage. That translates to less rain and an increase in surrounding drought conditions.

Advantages of Installing a Cool Roof

Cool roofs typically cost the same as other comparable roofing materials. For cool roofs that may cost slightly more, the difference can be quickly recovered in savings from lower energy consumption, rebates, incentives, HVAC equipment downsizing, and extended roof lifespan. Consider the following advantages and benefits of cool roofs:

  • Reduced energy bills by 10%-30%
  • Improved comfort for indoor spaces without air conditioning
  • Lower maintenance costs
  • Extended roof life

And consider the following environmental benefits:

  • Less peak electricity demand (helps prevent power outages)
  • Reduced urban heat island effect (occurs when an urban environment is hotter than surrounding rural areas due to black surfaces)
  • Alleviated air pollution and global warming concerns by lowering CO2 and other HVAC-related emissions

Note: Building owners must consider the region’s climate. Cool roofs achieve the greatest cooling savings in hot climates but may not decrease energy usage and costs in cooler climates.

Disadvantages of Installing a Cool Roof

Even cool roof opponents must acknowledge that cool roofs significantly reduce air conditioning loads. According to the US Department of Energy, roofs can reach 150°F on the hottest days, whereas installing a cool roof reduces those surface temperatures by as much as 50°F. However, there are potential drawbacks like:

  • High retrofitting costs. Converting an existing roof can be costly, especially when you factor in repair work, recoating, and cleaning costs.
  • Potential for algae or mold growth
  • Lighter roofing system colors may appear dirtier
  • Increases winter heating demand

Cool roofs work best for hotter climates, where the cooling season is more extended, and air conditioning is in high demand. In colder regions, these roofs may have the opposite effect, driving up heating costs in the winter.

Installing a Cool Roof

When deciding whether to install a cool roofing system, you need to determine if the energy savings and other benefits can justify the cost. How much energy you save depends on several factors like your structure’s climate and surroundings, the roof assembly’s insulation, the roof type, and the efficiency of your building’s HVAC system.

When building a new structure, you can decide during the planning phase what roof type to install and whether or not it should be a cool roof.

Cost and Energy Savings

There are many advantages and disadvantages to installing a coll roofing system like lower maintenance costs

A cool roof does not necessarily cost more than a conventional roof, especially if you are installing a new roof or replacing an existing one. However, converting a standard roofing system that’s in good condition into a cool roof can be costly. 

Cool Roof Rating Council

The Cool Roof Rating Council (CRRC) (created in 1998) develops accurate and credible methods for evaluating and labeling solar reflectance and thermal emittance (radiative properties) of roofing products and disseminating that information to all interested parties. For more information on cool roof structures, components, and ratings, visit the Cool Roof Rating Council at coolroofs.org

Cool Roofing Systems

In this article, you discovered crucial information on the definition, advantages, and disadvantages of installing a cool roofing system on your residential or commercial structure.

Knowing how a cool roof can benefit your structure and the environment will help you come to an informed decision when you need to install or replace your roof.

Ignoring the disadvantages of a cool roof system can leave you with increased utility bills due to your HVAC system struggling during colder weather.

Sources:
energy.gov/energysaver/cool-roofs
energystar.gov/products/roof_products/cool_roofs_emissivity
epa.gov/heatislands/using-cool-roofs-reduce-heat-islands

The post Advantages and Disadvantages of a Cool Roof appeared first on atlantacommercialroofingcontractors.com

Thursday, September 22, 2022

How to Tornado-Proof a House

Typical home construction is vulnerable to tornado damage

Avoid losing your life or home when a tornado rips through your neighborhood. Knowing how to protect yourself and your home from the destructive forces unleashed by a tornado will help you prevent life-threatening injuries and the loss of your home.

atlantacommercialroofingcontractors.com gathered the following information and tips on how to build or upgrade your home to withstand the intense winds and debris clouds generated by a tornado.

How a Tornado Destroys a Home

EF-2 and EF-3 tornadoes with 111 mph-165 mph winds can obliterate your home in four seconds. Flying debris can shatter windows and create other openings in exterior walls. Once such an opening is made, air enters the home and pressurizes it like over-inflating a balloon, potentially blowing off the roof and collapsing the remaining structure.

Few, if any, above-ground structures can survive an EF-4 or EF-5 tornado with 166 mph and greater winds. Underground shelters are designed and advised for this scale of destructive force.

Ways to Tornado-Proof Your Home

What steps can you take to protect your home from tornadoes? The following precautions, upgrades, and tips (some mandated by building codes in high-risk areas) are similar to those you would take in preparation for hurricane season:

1. Install Impact-Resistant Windows

Install impact-resistant windows. Such windows are considerably more expensive to buy but can be customized to the space and provide better protection than ordinary windows. Depending on where your house is located, these windows may be required by local building codes.

If impact-resistant windows are not an option, you can install hurricane shutters, which can also be completely customized (sizes, materials, and colors) to fit any residence.

Note: Some people believe they should open their windows and doors to normalize interior and exterior pressure during a tornado, but that’s the wrong thing to do. Doing so makes the inside of the house pressurized, like inflating a balloon until it pops. The air pushes off the roof or a wall and causes the structure to collapse or be blown away.

Roofing materials should be rated to resist high winds, and the system should be secured to the structure using hurricane clips, which create a stronger (more stable) connection between the roof and the house.

Hurricane clips are required by building codes in hurricane-prone regions. When repairing, upgrading, or replacing your roof, ensure all roof and wall framings are secured with hurricane framing clips. All other materials should be wind-rated and impact resistant.

Upgrades and reinforcements are necessary for a home to survive a tornado

3. Secure the Home’s Doors

Ensure that entry doors have a two-inch deadbolt lock mechanism and three hinges, with screws long enough to secure the door and frame to the wall framing. A door secured in this fashion is more likely to resist intense winds and wind-driven debris impacts.

Note: Your garage door, the largest potential opening in your home, is another vulnerable component. If the garage door fails, is left open, or is taken out, it compromises the structure of your home. Install wood or metal reinforcements for added structural support.

4. Install a Storm Shelter

When deciding where to locate or construct a home storm shelter, consider the envelope of the structure. The basement is the safest location, followed by the center of the home (anywhere with little potential for compromised doors and windows).

Note: A tornado’s duration and aftermath are entirely unpredictable. Prepare your home shelter by stocking it with essentials like a battery-powered radio, a flashlight, spare batteries, water, and ready-to-eat food like energy bars (anything you don’t have to cook).

Tip: Be sure to safely store a few hundred dollars in cash. ATM machines may not work if there is a power failure along with the tornado.

What is the EF Scale?

The Enhanced Fujita Scale or EF Scale, used since February 1, 2007, is used to assign a tornado a ‘rating’ based on its estimated wind speeds and damage.

When tornado-related damage is surveyed, it is compared to several Damage Indicators (DIs) and Degrees of Damage (DoD) which help better define the range of wind speeds the tornado likely produced. From that, a rating (from EF0 to EF5) is assigned.

SCALE

CLASS

WIND SPEED MPH

DESCRIPTION

EF-0

weak

65-85

Gale

EF-1

weak

86-110

Moderate

EF-2

strong

111-135

Significant

EF-3

strong

136-165

Severe

EF-4

violent

166-200

Devastating

EF-5

violent

> 200

Incredible


Note:
Dr. T. Theodore Fujita first introduced The Fujita Scale in the Satellite and Mesometeorology Research Project (SMRP) Research Paper, #91, published in February 1971 and titled, “Proposed Characterization of Tornadoes and Hurricanes by Area and Intensity.”

Tornado-Proof House

In this article, you discovered life-saving information and tips on how to build or upgrade your home to resist the destructive forces of tornadoes.

Investing in your home’s infrastructure and preparing for severe weather events like tornadoes can keep you and your loved ones out of harm’s way and sheltered in a safe location.

Ignoring the potential of a deadly hurricane strike in your neighborhood will leave you unprepared and vulnerable to life-threatening weather conditions and injuries.

Sources:
weather.gov/tae/ef_scale
depts.ttu.edu/nwi/Pubs/FScale/Fujita01.php
basc.pnnl.gov/information/design-windstorm-and-tornado-protection
ready.gov/sites/default/files/2020-04/tornado-protection_selecting-refuge-area-in-buildings.pdf

The post How to Tornado-Proof a House appeared first on atlantacommercialroofingcontractors.com

Friday, August 12, 2022

How To Use a Safety Harness on a Roof

Roofing safety includes using a body harness to prevent falls and injury

Avoid severe injury and death from falling off a roof. Knowing how to use a safety harness when on a roof can save you from catastrophic injuries.

atlantacommercialroofingcontractors.com gathered the following information and tips about using safety harnesses and other life-saving equipment.

What is a Roofing Harness?

A safety harness is a roofer’s best protection from deadly falls. Selecting the correct fall protection harness and properly using it will protect you from falls and serious injuries. Fall protection harnesses are only one option among several fall protection systems. However, they are widely used by residential and commercial roofers.

How To Use a Roof Safety Harness

The following are the main steps to properly use a roofing safety harness.

Check Your Harness – Before using any safety harness, make sure the webbing is in good shape and not frayed.

Fall Clearance Calculation – One of the most critical safety factors is verifying that you have an adequate fall clearance distance (typically three times your height).

Attach Your Harness – Attach thigh, hip, waist, chest, and shoulder straps and clip onto an anchor point that will hold you from falling off the roof.

Hook on Your Lifeline and Rope Grab – The lifeline and rope grab are different ropes. A lifeline is a line connecting your lanyard and rope grab to the harness and anchor point. The rope grab helps you keep yourself stable on the roof.

Lanyard (Fall Protection) – Your lanyard is the fall protection that’s required to ensure you stay safe on the roof. It’s a simple shock-absorbing system that helps reduce the severity of a fall.

Tip: All commercial and residential roofing companies must have their crews trained in fall prevention and the proper use of Personal Protective Equipment (PPE).

How Does a Safety Harness Work?

Similar to a repelling harness, the adjustable buckles and straps are strategically located in body areas that will easily support the wearer’s weight. These key areas of the body include the shoulders, chest, pelvis, and upper thighs.

Safety harnesses work by distributing the force of a fall over a large area of the body, ensuring that the roofer remains suspended in an upright position after a fall has occurred. In short, safety harnesses are designed to catch a person in case of falling while working at height.

Do Roofers Have to Wear a Harness?

Where OSHA is concerned, there is NO SAFE DISTANCE from a roof’s edge. To protect roofers and roofing maintenance workers, you must have rails, fall arrest systems, or a warning line/safety monitor, no matter where you are working.

What is the Difference Between a Harness and a Safety Belt?

A safety or body belt fits only around a person’s waist, whereas a safety or body harness fits around a person’s legs, arms, and torso.

Note: Per OSHA, Body or safety belts are not acceptable in a Personal Fall Arrest System (PFAS) because they can cause severe injury during a fall.

Are Safety Harnesses Considered PPE?

Yes. Personal Protective Equipment (PPE) includes anything used or worn (including clothing) to minimize risks to a person’s health and safety. This can consist of respiratory protective equipment, hearing protection, eye protection, protective clothing, and safety harness systems.

Fall Protection Training (OSHA)

Roofing safety includes using a harness to protect workers from falls

According to the Occupational Safety and Health Administration (OSHA), employers must provide fall protection training for all workers who may be exposed to fall hazards. Such training must be conducted by a trained/qualified person and include information on recognizing fall hazards and on what procedures to follow to minimize them.

Training must address how to properly inspect, erect, disassemble, and maintain the fall protection equipment used in an installation, repair, replacement, or inspection job. Retraining is required when:

  • Previous training becomes obsolete (changes in work conditions, fall protection systems, or equipment)
  • When worker performance indicates a need for it

Employers must certify that workers have been trained by documenting it in accordance with OSHA’s Certification of Training.

Can Roofers Fall Through a Roof?

Yes. While many more roofers fall off the eaves and rakes than fall through the decking of a deteriorating roof, roof opening, or skylight. However, the Bureau of Labor Statistics (BLS) notes that the recent number of employees falling through roof openings and failures is on the rise.

Roof Safety Harness

In this article, you discovered essential information and tips on proper safety harnesses usage for any roofing activities.

Knowing how to properly use and attach a safety harness will minimize or prevent the possibility of severe injury resulting from a fall off a roof.

Ignoring the requirement for safety harnesses while working on a roof can result in catastrophic injuries, hospitalization, and death from a fall.

Sources:
cdc.gov/niosh/docs/90-100/default.html
osha.gov

The post How To Use a Safety Harness on a Roof appeared first on atlantacommercialroofingcontractors.com

Thursday, June 16, 2022

How To Roof with Shingles

Roofing with shingles requires experienced installers and quality material

Avoid catastrophic structural damage and loss of revenue from an improperly installed shingle roofing system. Knowing how a shingle roof is installed will help you do it or get it done right the first time.

atlantacommercialroofingcontractors.com gathered the following information and tips about how to properly install a shingle roofing system on your residential or commercial building.

Laying Shingles

Shingles protect sloping roofs and the structure beneath from the effects of rain, snow, and hail while providing an attractive covering for the structure. Installing an impermeable roofing layer of shingles is an efficient way to avoid leaks and structural water damage. Proper shingle installation will provide you with 20 to 30 years of unwavering protection. Consider the following steps and tips:

1. Remove or “Tear Off” Your Old Roofing System – Removing your old roofing system allows you to thoroughly inspect the structural integrity of the roof deck and make any necessary repairs before moving forward. For new construction, the roof deck should be inspected before installing a roofing system on it.

Do not proceed with any roofing activities (Tear off or installation) until all applicable permits have been acquired by you or your roofing company. Failure to obtain these permits may result in the forced removal of any and all unpermitted work performed.

2. Verify or Instal Insulation – This component is not actually on your roof but underneath it. In your structure’s attic is or should be installed a crucial layer of insulation. This insulation minimizes internal heat loss and protects the multiple layers of your roof from extreme temperatures that can quickly damage and break down roofing materials.

3. Verify Attic Ventilation – Ventilation allows hot, moist air to escape from your attic instead of being trapped underneath your roof. Ventilation problems can result in mold and severe damage to your roofing frame and deck.

4. Inspect or repair the Roof Deck – Resting on the structure’s framing is the roof deck. Sheets of plywood typically make up the deck, connecting and stabilizing the trusses and joints of the framing, providing a solid and secure surface to layer the rest of the roof onto.

5. Instal a Water Barrier (Underlayment) – There needs to be a protective waterproofing layer between the roof deck and shingles. This water barrier is an adhesive layer applied directly to the roof deck, which protects against water infiltration from melting ice or wind-driven rain.

6. Instal a Starter Strip – A starting layer or strip of shingles lines the edge of every shingle roofing system. This component is laid down beneath the underlayment to seal the roof’s edges. This layer is meant to defend the rest of the roofing system against strong winds and reduce or eliminate shingle blow-off.

7. Shingle Installation – Shingles protect your structure from the sun, water, and other weather conditions. The granules on shingles are typically made up of fiberglass, providing form and strength. Here’s how to install or “lay” them:

  • Lay the first row of shingles directly covering the narrow starter strip
  • Lay the second row of shingles offset to facilitate drainage and provide structure
  • Shingle around stacks, vents, and chimneys as necessary
  • Interlace the flashing and shingles around the chimney

Repeat this process, moving up the roof deck until reaching the roof ridge.

Note: Shingles can be made from wood, slate, flagstone, metal, plastic, and composite materials like fiber cement, fiberglass, and asphalt.

8. Instal Flashing – Flashing is typically made from sheet metal and is installed where seams are located (valleys, walls, chimneys, etc.). Flashing is installed to prevent water from penetrating and damaging your roof.

9. Instal the Ridge Cap(s) – This is a shingle (or series of shingles) that runs along the ridge line of a sloped roofing system. It’s installed over the joint of two edges and keeps rain and snow from seeping or running into the roof. Ridge caps also allow heat and moisture to escape from the attic space.

Tip: Inform yourself about the shingle manufacturer’s installation requirements (spacing, attachment method, underlayment, and inspections) to preserve material and installation warranties.

Roofing System Installation

Shingle roof installation requires an experienced roofing contractor

When quoting a roofing installation, repair, or replacement (assuming you will not do the work), be sure to thoroughly vet the bidding roofing companies. Consider asking the following questions:

  • Are they licensed to operate in your area?
  • Is the company bonded?
  • Are they insured?
  • How long have they been in business?
  • Does the roofer have references?
  • What warranties are available?

Tip: Read and consider customer reviews and complaints, then inquire about how the company handled or resolved them.

Shingle Roof Installation

In this article, you discovered shingle roofing system information and tips to help you properly install a shingle roof on your structure.

Proper roofing installation is essential to protect your building and ensure that the roof has the longevity to reach its full potential lifespan.

Prevent poor or incorrect shingle roof installation that leads to leaks, costly structural damage, and eventual catastrophic roofing system failure.

Sources:
et.byu.edu/~bcc32/CM211/notes/roofing/ShingleInstallation.pdf
pages.drexel.edu/~kms35/roof_components.htm
rmrc.wisc.edu/ug-mat-roofing-shingle-scrap/
checkbook.org/v2/docs/roofers/all-areas-roofers-parts-of-a-roof.pdf

The post How To Roof with Shingles appeared first on atlantacommercialroofingcontractors.com

Tuesday, May 17, 2022

How To Find and Fix a Roof Leak

Some roof leaks can be easily repaired but others will need a professional roofer

Prevent costly structural damages and messy repairs due to a leaking roof. Knowing how to find and fix a roof leak can save you considerable money and avoid unnecessary angst.

atlantacommercialroofingcontractors.com gathered the following information about how to pinpoint leaking areas in your roofing system and promptly repair them.

Leaking Roofing Systems

Whether you have a sloped residential roof, an industrial metal roof, or a commercial flat “membrane” roof, they have one thing in common: they all use gravity, slopes, and drainage systems to move water away from the roof.

A roofing system can fail when any of the following occur:

  • Membrane seals separate
  • Fasteners corrode
  • Roofing components suffer storm damage
  • Wind-driven objects perforate the roofing system
  • Falling tree impacts the roof and structure.
  • Wildlife interrupts the roof’s drainage system
  • Gutters and downspouts are clogged by falling leaves
  • Hail, snow, or ice buildup damage the roof
  • The roofing system was poorly installed
  • Annual inspections are ignored
  • Minor repairs are put off
  • Water begins pooling
  • Fire damage

Roofing systems are engineered to protect the structure they cover. However, with time, water can find ways to circumvent your roofing system and leak into your structure. Here’s how to find and fix a leak in your roofing system:

Leak Detection

Sometimes, roof leaks are blatantly obvious, leaving watermarks and stained ceiling tiles in their wake. However, roof leaks can start off unnoticeable and suddenly turn into a severe flooding situation. Here are some effective ways to detect roofing system leaks:

  • Drips
  • Ceiling tile stains
  • Water-stained/damaged wall
  • Excessive dampness/humidity

Tip: Most roofing system problems and leaks can be prevented by acquiring a maintenance program from your roofer.

How Do I Find a Leak in My Roof?

Once you have determined that your roofing system has a problem, head outside and visually inspect your roof:

  • Start with parts of the roof higher than the location of internal indications or stains
  • Look for any signs of roof penetrations
  • Inspect the roof’s flashing for damages
  • Examine roof vents

If you see any damaged areas on your roof, tiles, corrugated iron sheets, membrane, or shingles, this could be the leak’s origin. If your roofing system has multiple layers like built-up roofing (BUR) or modified bitumen (Mod-Bit), sneaky leaks can travel across your roofing system using gravity which keeps water moving downward and transpiration or evaporation to move it upward or horizontally.

Note: Water leaks can be highly elusive when they trace along rafters, support columns, or follow erratic paths before emerging as leaks. If you have trouble finding the source of your leak, call a professional roofer to help.

Tip: Membrane roofing systems (EPDM, TPO, etc.) typically have long-running seams where sheets overlap and are sealed together. Leaks can occur when these seams separate.

How Do I Fix a Leak in My Roof?

Roofing systems can leak from broken panels ruptured membranes or dislodged tiles

There are infinite ways your roofing system can start leaking and just as many methods to fix them. The following are quick fixes that can buy you time until a professional roofer can evaluate and repair the roofing system:

Fix Step Flashing – If your roof flashing rusts through or comes loose, water will run behind it and into the structure. Rusted, slipped, or damaged flashing needs to be replaced. That involves removing shingles, prying siding loose, then removing and replacing the step flashing.

Repair Small Holes – Tiny holes in roofing systems are sneaky because they can cause rot, a leaky roof, and other minimal damage for years before you even detect the signs of an active leak. You might find holes left over from a satellite dish base or antenna mounting bracket, or just about anything previously fastened to the roof.

Note: Any exposed or misplaced roofing repair nails or mounted fastening nails should be removed and the holes patched.

Tip: Small holes are simple to fix. However, the fix isn’t to just inject caulk into the hole. This leaky roof problem will be corrected with flashing.

Repair Leaks around Chimneys – Flashing around chimneys can rust through and cause horrendous damage to the chimney and the building’s structure. A quick and short-term fix is to slip new flashing under the old rusted flashing material.

Replace or Patch Shingles, Membranes, and Asphalt – Provided you have the necessary material to match, patch, or replace a part of your roofing system, you may be able to temporarily halt small roof leaks.

Note: For shingle roofs, once fastening nails are removed, the damaged shingle should slide out. Scrape away any residue cement and level or remove any protruding nails. Once the new shingle is in position, lift the corners of the overlapping shingles and fasten the top of the new replacement in each corner. Cover the nail heads with roofing cement and smooth the overlapping shingle edges.

Tip: If you do not have extra roofing material or components to repair your damaged roofing system, call a professional roofer to handle the repair and preserve the roofing system’s warranty.

How Long Can You Ignore a Leaking Roof?

There is no definitive answer to how long you can ignore a leaking roof before causing severe and sometimes irreparable structural damage. Multiple variables can contribute to roofing leaks, structural damages, and roofing system failure. It is always recommended to play it safe and repair or get your roof leak fixed immediately.

DIY Roof Repair

In this article, you discovered how to detect and locate the source of a leaking roof and how to immediately fix it or get it fixed.

By promptly fixing leaks in your roofing system, you are preventing structural damages and helping your roof properly function up to and beyond its life expectancy.

Ignoring roof leaks of any size can result in costly structural damages, roofing system failure, and loss of business when your structure must be closed for repair.

Sources:
mit.edu/parmstr/Public/NRCan/CanBldgDigests/cbd179_e.html
kenosha.extension.wisc.edu/files/2010/06/Leaky_roofs.pdf
sites.udel.edu/csweeny/2021/08/16/roof-restorations-and-replacement-is-it-time/

The post How To Find and Fix a Roof Leak appeared first on atlantacommercialroofingcontractors.com

Thursday, March 17, 2022

9 Easy Ways to Increase Your Home’s Curb Appeal

Increase curb appeal by upgrading your homes appearance

Avoid losing money on your most valuable investment by not knowing how to increase its curb appeal. Knowing how to raise your home’s curb appeal will help you take it to market and get the value you deserve.

atlantacommercialroofingcontractors.com gathered the following information about easy ways to raise your home’s curb appeal and its overall value.

1. Install Outdoor Lighting

Besides being a deterrent to wannabe thieves and vandals, installing walkway and garden lighting highlights your front yard’s features and makes your home a more welcoming place.

2. Replace Your Home’s Hardware

You can sharpen the image of your home by replacing or updating its hardware. Some of the items you can replace include:

  • Porchlight fixtures
  • Door handles
  • Locks
  • Mailbox
  • Street numbers

Tip: Make sure the features you replace match. This gives an image that the appearance of your home was planned and not haphazardly thrown together.

3. Shutters and Accent Trim

Increase curb appeal by matching shutters and trim

A fast way to add definition to your home and highlight its features is to install shutters for your windows and run accent trim around the features you want to draw attention to.

Tip: Use contrasting colors for trim and shutters to give them a more significant impact.

4. Replace Gutters and Downspouts

Nothing screams “rundown home” more than dented or peeling gutters and downspouts. Quickly perk up the appearance of your home and guarantee the diversion of rainwater from your roofing system with updated gutters and downspouts.

5. Repair or Replace Your Roofing System

Increase curb appeal by installing a new roofing system

A home’s roofing system is typically one of the deciding factors when closing its sale. Prospective buyers tend to run away from homes in need of significant or expensive roof repairs.

A leaking roofing system is often responsible for causing extensive structural damages requiring costly repairs.

Ultimately, a new or repaired roofing system not only looks good and increases its curb appeal but adds a sense of security to your home.

Note: Your roofing system carries considerable weight when your home is being evaluated for its market value.

Tip: The value of an existing or new roofing system is considered hard equity and can be added to the value of the home.

6. Repaint Your Home

One of the fastest ways to clean up the appearance of a home is to give it a fresh coat of paint. Painting gives you the opportunity to:

  • Find and fix exterior damages or flaws
  • Update the home’s appearance
  • Change its color scheme
  • Highlight exterior features
  • Thoroughly clean up its exterior

Note: Small structural defects or flaws are often only detected when repainting.

Tip: Repainting your home can have the most significant impact on its curb appeal.

7. Renew Your Landscape

Your home’s landscaping can be a significant attraction or deterrent to potential buyers. Some of the following are common ways to update your landscape:

  • Install or plant a hardy lawn/turf
  • Plant trees, shrubs, and plants
  • Install a pathway
  • Install lighting (see #1)
  • Add a water feature to your garden or lawn
  • Replace your cracked driveway
  • Install edging or barriers along pathways and sidewalks
  • Highlight your garden with flowering shrubs and plants

Tip: In regions with water restrictions, consider installing a southwestern style landscape with gravel, rocks, and drought-tolerant plants like cactus.

8. Install Window Boxes

Increase curb appeal by installing window boxes

Installing window boxes is an incredible way to increase your home’s garden space while increasing its curb appeal. The following flowering plant species look good and are highly desirable for use in window boxes:

  • Marigolds (Tagetes)
  • Tulips (Tulipa)
  • Daisies (Bellis perennis)
  • Gerbera Daisies (Gerbera)
  • Snapdragons (Antirrhinum)
  • Lilacs (Syringa)
  • Gardenias (Gardenia)

Tip: Match the color of your window boxes with your home’s shutters and accent trim to provide a sense of continuity to the home’s exterior.

9. Make Your Garden Stand Out

Increase curb appeal by planting a blooming garden

A lush, healthy, vibrant, and flowering garden can make even a mediocre home look good. Consider the following to sharpen your garden’s appearance:

  • Enrich the garden’s soil
  • Adjust the soil’s pH to help plants thrive
  • Ensure proper draining for excess water
  • Mulch your garden
  • Install a small fountain or water feature
  • Use stones, bricks, or barriers to define garden space
  • Plant flowering shrub and plant species
  • Plant a small or dwarf specimen tree

Tip: Use flowering evergreen shrubs to outline your garden, driveway, and pathway.

Increased Curb Appeal

In this article, you discovered simple ways to increase your home’s value by making it significantly more attractive, thus increasing its curb appeal.

By taking steps to increase your home’s curb appeal, you are likely simultaneously growing its overall market value.

Ignoring your home’s appearance and maintenance needs can cause its market value to plummet, leaving you with significant losses on your most important financial investment.

Sources:
newswire.caes.uga.edu/story/5761/curb-appeal.html
gardeningsolutions.ifas.ufl.edu/design/outdoor-living/curb-appeal.html
ucanr.edu/blogs/blogcore/postdetail.cfm?postnum=38557
pdxscholar.library.pdx.edu/cgi/viewcontent.cgi?article=1044&context=busadmin_fac

The post 9 Easy Ways to Increase Your Home’s Curb Appeal appeared first on atlantacommercialroofingcontractors.com

Monday, February 21, 2022

Reroofing vs. Roof Replacement Pros and Cons

Commercial flat reroofing in progress

Prevent unscrupulous roofers from talking you into something more expensive that you may not need. Knowing the differences between reroofing and roof replacement can help you make informed decisions and better communicate with your roofer.

atlantacommercialroofingcontractors.com gathered the following information about the differences between reroofing and roof replacement and some of the pros and cons with each one.

Reroofing vs. Roof Replacement

When the time comes to fix your commercial or residential roof (structurally or cosmetically), you will often face the choice to have either a reroof or a roof replacement. Consider the following information about each one:

What Is Reroofing?

Commercial flat reroofing job

Reroofing is the process of layering one roofing material over an existing one. This process can only be done once, so if there are two layers of roofing already in place, reroofing is not an option for you.

Because there is no tear-off, reroofing can go much faster and be much less expensive than a complete roof replacement.

Reroofing Pros

Here are some of the advantages of reroofing:

Stronger Support – Since you’re adding a second protective layer, it’s also adding strength to your roof. The extra material strengthens the roof and makes it more difficult for water to get into your house or structure.

Less Expensive – Unlike a full roof replacement, reroofing does not involve the same labor, materials, and time (making it a less expensive option).

Faster Process – Reroofing does not require removing your original roofing material, making this process the fastest way to restore your roof. Reroofing is quick and easy to do. 

Cosmetic Improvement – Many roofing systems end up discolored or dirty over the years. Reroofing can give your structure a total roof “makeover” without fully replacing it.

Reroofing Cons

Here are some of the disadvantages of reroofing:

Hidden Damages – Reroofing only works to cover the current roofing material. A roofer would be hard-pressed to know or detect any existing damages underneath, like sagging or rotting in the substrate. A new layer of shingles will not fix potentially significant issues. 

Two Layer Limit – If you already have two layers of roofing material on your roof, you are prohibited in most municipalities from adding a third layer.

Metal Roofing – If you have a metal roofing system, reroofing is not recommended.

Roof Lifespan – Reroofing may not last as long as completely replacing the roof (existing problems can go unnoticed and cause premature roof failure).

Note: Roofing systems come engineered to support the weight of two layers of roofing. However, they are not typically constructed to support a third layer, and for this, there is a two-layer limit.

What is Roof Replacement?

Completed roof replacement

Roof replacement involves tearing off everything down to the deck then installing new insulation and roofing. Unlike reroofing, a roof replacement can be done no matter how many layers of roofing material are already on the roof, so a replacement can be done even when reroofing is not an option. Because of the extra labor involved, it can be significantly more expensive than reroofing.

Roof Replacement Pros

Here are some of the advantages of a roof replacement:

No Layer Limit – Roof replacements can be done no matter how many layers of roofing are on the substrate.

Early Problem Detection – A replacement enables you to identify early signs of trouble like rot and sagging from water damages to the deck, which can eventually allow water to leak and drip down inside walls where it can cause significant structural damage resulting in costly repairs.

Roofing System Lifespan – Completely replacing the roof makes it last longer than reroofing.

Safer Alternative – Unlike reroofing that may cover up any issues with the deck, like rot, which can eventually cause catastrophic roof failure, a fully revamped roof addresses all issues for a safer and sturdier roofing system.

Roof Replacement Cons

Here is the primary disadvantage of a roof replacement:

Cost – Entirely replacing a roofing system requires more materials, time, and labor than reroofing. It is a significantly more costly project.

Reroof and Roof Replacement Cost Differences

Damaged roof waiting for reroofing or replacement

The same cost factors of reroofing apply to roof replacement, but the average cost to replace a roof is significantly higher than reroofing. This is due to the extra labor to remove all of the old roofing system, as well as prepare the substrate for a new roofing system installation. These tasks significantly increase your costs.

Reroof or Replace

In this article, you discovered the differences between reroofing and roof replacements and their pros and cons.

Knowing what is involved with a reroof and a roof replacement will allow you to have eye-to-eye conversations with your roofer when it comes time to make decisions about your roofing needs.

Ignoring the differences between reroofing and roof replacement can leave you vulnerable to sneaky roofers out to make a fast buck with minimal effort.

Sources:
manufactureredhousing.org/what-is-a-complete-roof-replacement
sites.udel.edu/csweeny/2021/08/16/roof-restorations-and-replacement-is-it-time/

The post Reroofing vs. Roof Replacement Pros and Cons appeared first on atlantacommercialroofingcontractors.com

Thursday, January 20, 2022

Green Roof Installation on a Flat Roofing System

Installed green roofing on modern buildings

Prevent being overwhelmed with the installation and cost of converting your flat roofing system to a green roof. Knowing what a green roof is, what one does, and what investment to expect will help you make informed decisions.

atlantacommercialroofingcontractors.com gathered the following information about what a green roof is, where this concept/technology comes from, what a green roof does, What benefits you can expect from having a green roof, and what cost you can expect to have one installed.

What is a Green Roof?

A green roofing system is a vegetation layer planted over a waterproofing system installed on a flat or slightly–sloped roof. Green roofs are also commonly referred to as “vegetative” or “eco-roofs.” They are typically grouped into three categories being extensive, intensive, and semi-intensive:

Extensive Green Roofing – An extensive green roof has an extremely shallow growing medium, usually measuring less than six inches. This green roofing has a modest roof load, limited plant diversity, minimal watering/care requirements, and is more often than not inaccessible.

Intensive Green Roofing – Intensive green roofs will have more soil and a deeper growing medium than extensive green roofs. This growing medium can often reach several feet and support a more diverse plant selection, sometimes including small tree species. These roofing systems possess a more substantial structural load and require more frequent maintenance and watering. These roofing systems are typically accessible.

Semi-Intensive Green Roofing – Semi-intensive green roofs will include features of both extensive and intensive green roofing. The depth of any green roof depends on the roofing structure (roof load), the plant species chosen, and annual rainfall.

All green roofs require specific layers of roofing materials typically not found on regular flat or sloped roofs. The basic anatomy of a green roof consists of:

  • Vegetation
  • Growing medium
  • Filter membrane
  • Drainage layer
  • Waterproof/root repellant layer
  • Roofing membrane support
  • Thermal insulation
  • Vapor control layer
  • Structural roof support
Green roof installation by layers

Note: Each of these layers performs an independent function to support the vegetation above and protect the building structure below.

Tip: Some green roofs may be installed in a single large integrated section, while modular green roof installations use small removable planting beds pieced together to create a more substantial green roof. These modular units may be made of plastic or metal and filled with a high-quality growing medium. Modular green roofing systems can be installed incrementally and are easily moved or removed for scheduled maintenance and periodic inspections of the roof layers beneath.

What Does a Green Roof Do?

Green roofing systems provide shade, reduce heat from the air, and lower both surrounding air and roof surface temperatures. Green roofs in cities or built-up environments with limited vegetation can significantly moderate the heat island effect. Green roofing systems’ average temperatures can be 30 to 40°F lower than those of conventional roofing systems.

What are the Benefits of a Green Roof?

Green roofing systems offer multiple benefits, often varying by region, building design, and climate. The following are expected green roof benefits:

Reduced Air Pollution and Greenhouse Gas Emissions – By reducing a structure’s air-conditioning and heating demand, green roofs are capable of decreasing associated air pollution and greenhouse gas emissions from typical power sources.

Reduced Energy Consumption – Green roofs remove heat from the air by evapotranspiration and can also act as insulators, reducing the energy needed to operate cooling and heating systems.

Improved Health and Comfort – Green roofing, by reducing heat transfer through the building’s roof, can significantly improve indoor comfort, and lower the stress associated with heatwaves.

Improved Quality of Life – Green roofs provide a structure with aesthetic value and rich habitat for plant and animal species. They naturally improve human interaction with nature by introducing green space in a built environment.

Improved Stormwater Management and Water Quality – Green roofing systems can significantly reduce and slow stormwater runoff in an urban environment while filtering pollutants from rainfall.

How Much Does Green Roofing Installation Cost?

The cost of a green roofing system varies significantly depending on the type and architectural factors like its growing medium’s depth, chosen plant species, the installation size, irrigation method, and the roof’s accessibility on inaccessibility.

An installed extensive green roofing system may cost from $15 to $30 per square foot. While intensive green roofs will typically require a more significant installation investment ranging from $20 to $40 per square foot.

Initial costs are typically offset as the green system extends the life of the roof membrane and reduces your building’s heating and cooling costs.

Green Roofing for Your Residential or Commercial Property

In this article, you discovered essential information about what green roofing is, what a green roof does, the benefits of a green roofing system, and the associated cost of green roofing installation.

Installing a green roofing system on your home or business will reduce your carbon footprint and save you money on heating your structure, furthering its benefits to the environment.

By not installing a green roofing system, you are contributing to your city’s rising temperatures, turning away potentially significant energy savings, and missing out on a valuable opportunity to contribute to the environment.

Sources:
greenroofs.org/about-green-roofs
epa.gov/heatislands/using-green-roofs-reduce-heat-islands
nps.gov/tps/sustainability/new-technology/green-roofs/define.htm

The post Green Roof Installation on a Flat Roofing System appeared first on atlantacommercialroofingcontractors.com

Can Roof Shingles Be Painted?

Many property owners wonder whether painting their roof is a viable way to refresh its appearance without the expense of a full replacement....