Wednesday, March 24, 2021

When Does a Roof Need To Be Replaced?

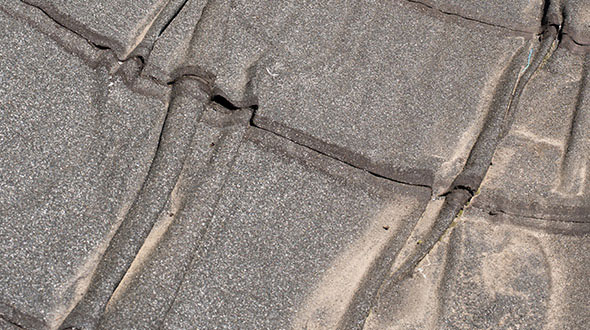
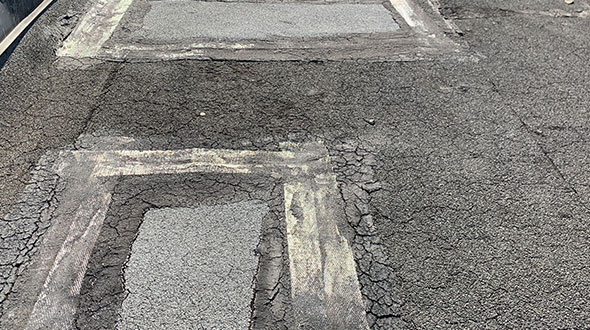
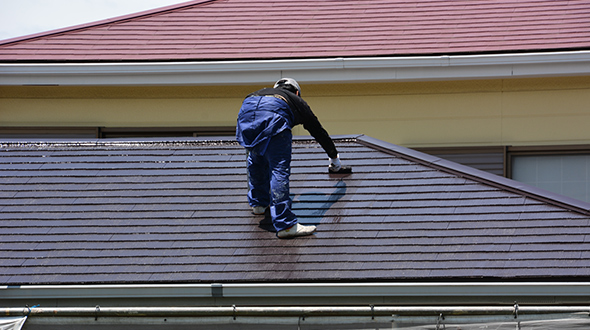
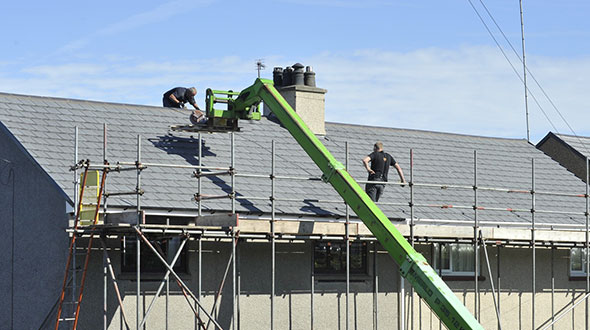
Roofing system rreplacement

Prevent catastrophic damages and injuries from a failed roofing system. Knowing how long different roofing systems are supposed to last will help you get it evaluated and replaced when the time is right.

atlantacommercialroofingcontractors.com gathered the following information to help you determine when your damaged or aging roofing system needs to be replaced.

What Impacts How Long a Roof Lasts?

Each type of roofing system has a projected lifespan. What determines a roofing system’s longevity includes:

  • Bi-annual inspections (spring and fall) under a maintenance program
  • Early detection of hidden problems/defects in the roofing system
  • Material quality
  • Installation quality (workmanship)
  • Weather patterns (severe weather events like hail, tornadoes, hurricanes, etc.)

A well-installed roofing system with continuous maintenance, care, and eventual repairs can last from 20 to 100 years, depending on the roofing material. Consider the following roofing systems:

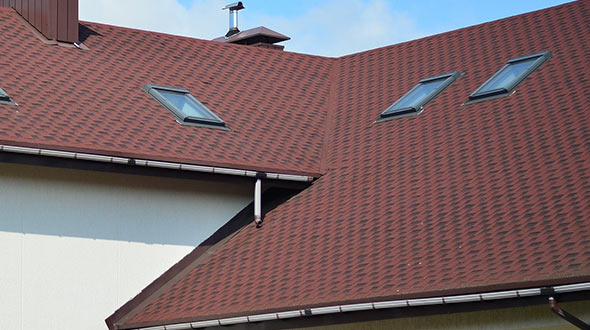
Composition Shingles 15 – 40 Years
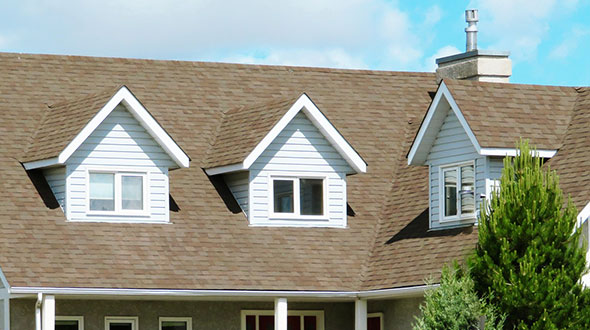
Composition shingle roofing system repair and replacement

Composition shingles are a composite product made from a fiberglass or cellulose mat, asphalt, and mineral granules. Composition shingle roofing systems are also environmentally friendly. Most composite roof materials are made with a paper backing and produced using recycled materials.

This durable roofing system can last an average of 15 to 20 years with minimal maintenance and care. When properly installed and maintained, this roofing system can last up to 40 years.

Signs that a composition shingle roof replacement may be necessary include:

  • Visible signs of roof or shingle aging
  • Multiple leaks
  • Missing mineral granules
  • Shingle curling (most common along edges)
  • Missing shingles
  • Moss growth on shingles
  • Algae growth (dark stains running down the roof slope)

Severe weather events are common factors in roofing system damages and failures. After such events, your roofing system should be inspected and repaired if possible.

Note 1: A typically hidden problem with shingle roofing systems is bad shingle adhesion. Contributing factors often include manufacturing inconsistencies, poor installation practices, advanced aging and shingle deterioration, cold weather installations, lack of attic ventilation, and repeated thermal expansion and contraction.

Note 2: Another, often hidden, issue occurs when gaps or openings are left in a roofing system's eaves, soffit, or fascia. These openings allow small animals/wildlife to enter attic space, destroying insulation or compromising a roofing system's integrity from the inside out.

Asphalt Shingles 10 – 20 Years
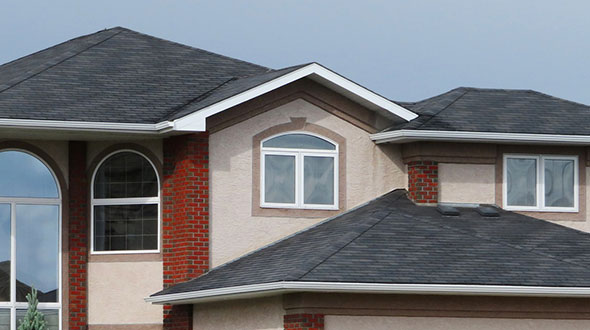
Asphalt shingle roofing system repair and replacement

Asphalt shingles are not made solely of asphalt. They consist of either a fiberglass or felt paper base coated with a waterproof layer of asphalt and topped with mineral or ceramic granules. Over the past four decades, fiberglass-based shingles have been the more requested product.

This roofing system can last an average of 10 to 15 years with minimal maintenance and care. When properly installed and maintained, this roofing system can last up to 20 years.

Similar to composition shingles, signs that an asphalt shingle roof replacement may be necessary include:

  • Visible signs of roof or shingle aging
  • Multiple leaks
  • Missing mineral granules
  • Shingle curling (most common along edges)
  • Missing shingles
  • Moss growth on shingles
  • Algae growth (dark stains running down the roof slope)

Note: Shingle roofing systems often hide water damage from failed flashing in valleys, around chimneys, and in poorly constructed chimney crickets or saddles. This type of failure can lead to multiple leaks, deck rotting, and eventual roof failure.

Severe weather events are common factors in roofing system damages and failures. Again, after such events, your shingle roofing system should be inspected and repaired if possible.

Wood Shingles Up to 30 Years
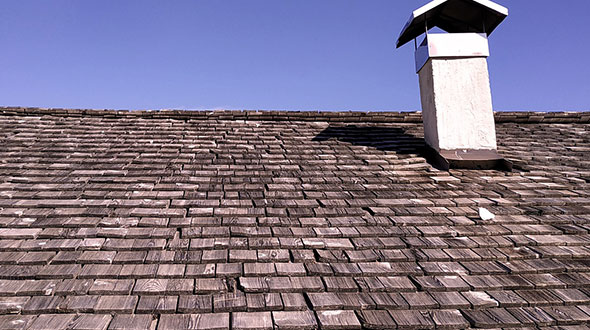
Wood shingle roofing system repair and replacement

Wood shake roofing and a wood shingle system are both typically made from cedar, cypress, redwood, or pine. While these wood products have similarities, they're produced differently. Wood shingles are usually machine cut on both sides, and wood shake material is created by splitting rectangles from a log.

Being rot and insect resistant, a wood shingle roofing system can last up to 30 years with diligent annual upkeep.

Signs that wood shingle or wood shake roof replacement may be necessary include:

  • Visible signs of aging or damage in multiple areas of the roof
  • Multiple leaks
  • Cracking, splitting, or warping shingles
  • Missing shingles

Often, these signs will be confined to a section of the roof, which may mean only a repair is needed.

Note: A commonly hidden problem with wood shingle roofing systems is a poorly ventilated attic. Moisture that cannot escape the attic is forced upward through the roof structure causing shingles to curl and buckle. This uneven warping traps water, exacerbating the roof's deformation and rapid decay of its framework.

Single-ply Membrane (TPO & PVC 15-30 Years, EPDM 30-50 Years)

Single-ply membrane roofing systems require fewer seams than asphalt roofing systems and don't require torches or hot asphalt for installation. Single-ply systems come with prefabricated finishing accessories that make installation easy. Consider the following:

TPO – TPO (thermoplastic polyolefin) is a single-ply membrane and is one of the fastest-growing commercial and residential roofing systems. TPO roofing systems are made of a single layer of synthetics and a reinforcing scrim used to cover flat roof substrates.
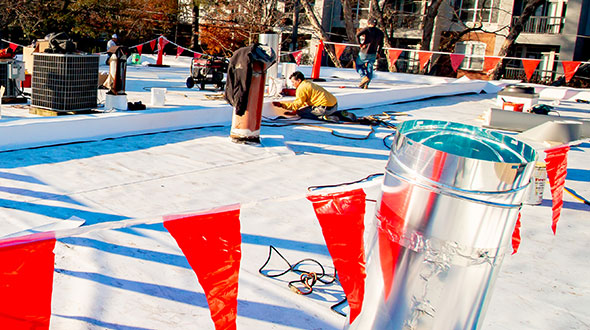
TPO roofing system repair and replacement

Because TPO is relatively new in the roofing industry, its full lifespan has yet to be determined. This roofing system can last an average of 15 to 20 years with minimal maintenance and care. When properly installed and maintained, this roofing system can last up to 30 years before replacement.

To learn the benefits, cost, and problems related to a TPO roofing system, read the TPO Roofing System Explained article.

Signs that a TPO roof replacement may be necessary include:

  • Visible signs of aging or damage in multiple areas of the roof
  • Multiple leaks
  • Chronic ponding
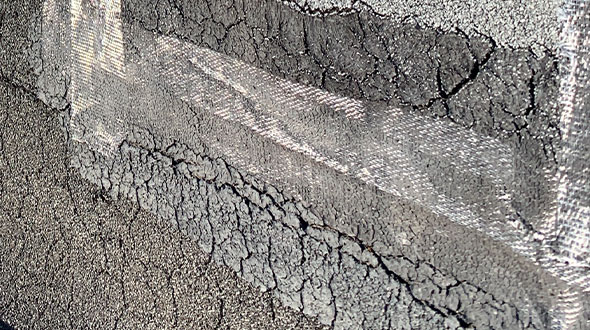
  • Severe alligatoring (shrinkage and cracking)

Note 1: Often overlooked and elusive are damages caused by a parapet wall's failed metal coping. This roofing system malfunction allows water to collect between the TPO membrane and roof substrate, ultimately resulting in leaks, membrane deterioration, and structural damages to the building.

Note 2: Another hidden problem for flat or low-sloped roofing systems occurs when internal drainage (drainage routed through the structure) becomes clogged. A blocked drainage system can lead to ponding and severe water damage requiring costly structural repairs and roofing system replacement.

Detected early, these issues can be halted with repairs. When the roofing system becomes compromised in multiple locations, replacement may be the only option.

PVC – PVC (polyvinyl chloride) roofing is a single-ply roofing system used on commercial, industrial, and residential flat or low-sloped roofs. PVC is among the world’s most widely produced synthetic plastic polymer.
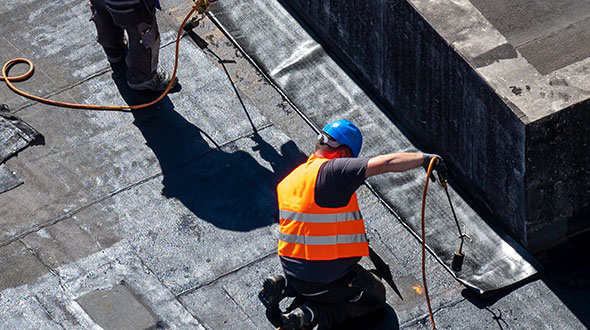
PVC roofing system repair and replacement

Like TPO, this roofing system can last an average of 15 to 20 years with minimal maintenance and attention. When properly installed and maintained, a PVC roofing system can last up to 30 years before replacement.

Like TPO, signs that a PVC roof replacement may be necessary include:

  • Visible signs of aging or damage in multiple areas of the roof
  • Long tears or rips
  • Multiple leaks
  • Chronic ponding
  • Severe alligatoring (shrinkage and cracking)

Note 1: Improperly welded or damaged seams can allow water infiltration, often remaining undetected until extensive damages have occurred to the roofing membrane and substrate, requiring the roofing system's replacement.

Note 2: Foot traffic to and from electrical equipment and other rooftop installations can result in membrane tears and roofing system damage that can also go undetected until such damages require extensive repairs or roofing system replacement. This type of damage can be prevented by installing reinforced walkways or paths wherever foot traffic may be required.

Detected early, these issues can be halted with repairs.

PVC is somewhat similar when compared to TPO, but there are some unique advantages and we suggest knowing The Difference Between PVC and TPO Roofing Systems.

EPDM – EPDM (ethylene propylene diene polymethylene) is a durable synthetic rubber roofing membrane produced using two primary ingredients, ethylene and propylene, derived from oil and natural gas.
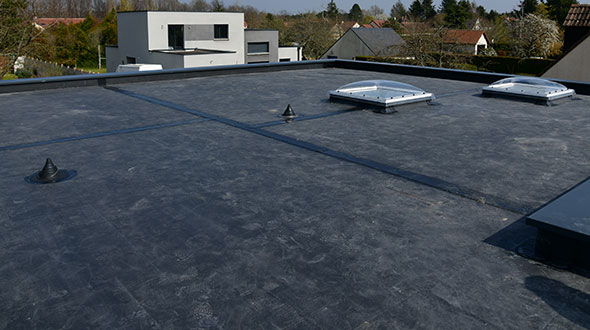
EPDM roofing system repair and replacement

Utilized worldwide in the roofing industry, EPDM membranes exhibit a high level of stability as they age. This roofing system can last an average of 30 years with minimal maintenance and care. However, when properly installed and maintained, an EPDM roofing system can last up to 50 years before requiring replacement.

Signs that an EPDM roof replacement may be necessary include:

  • Visible signs of aging or damage in multiple areas of the roof
  • Long tears or rips
  • Multiple leaks
  • Chronic ponding
  • Severe alligatoring (shrinkage and cracking)
  • Use of improper repair materials, including asphalt and roofing cements

Note: One of the more elusive complications for this and all other flat roofing systems is an incorrect slope (these roofing systems are often referred to as low-slope roofing systems). If the slope is too low, ponding can occur with heavy precipitation or even the slightest drainage obstruction. Ponding or water pooling leads to rapid deterioration of all roofing system components and will likely result in the need for a complete roofing system replacement.

To learn more of the benefits, installation process, cost, warranty, and problems with an EPDM roofing system, read EPDM Roofing System Explained.

Built-up Roofing (BUR) 30+ Years
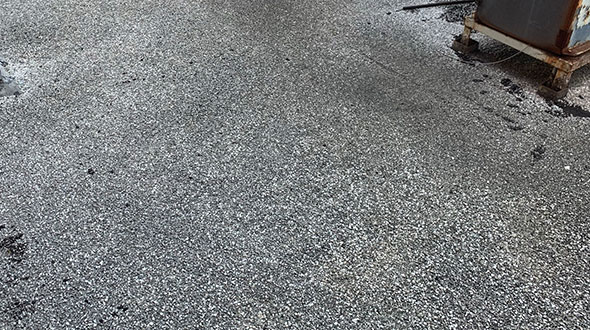
BUR roofing system repair and replacement

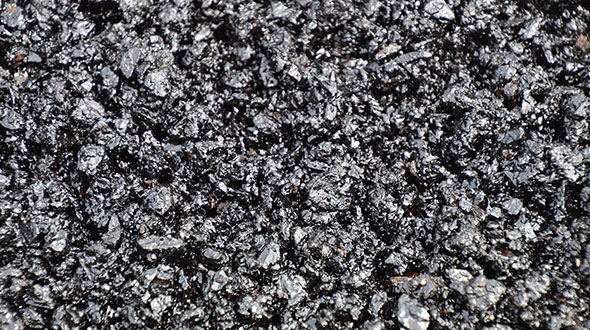
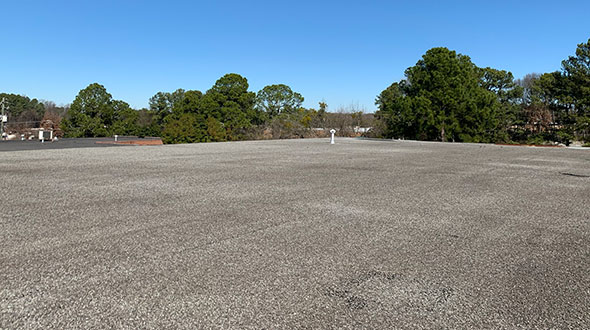
Built-up roofing systems consist of multiple layers of asphalt alternated with felt sheets applied over the roof deck (substrate), vapor retarder, and insulation that is attached to the roof decking. The system is then covered with a reflective membrane (cap sheet) or coating system.

Depending on the climate and materials used, a built-up roofing system has an average lifespan of 20 years. Well-installed and maintained BUR systems have been known to last 30+ years.

Signs that a BUR roof replacement may be necessary include:

  • Multiple leaks (especially after having been repaired)
  • Chronic ponding
  • Severe weather or impact damage

Note: Leaks occurring in a built-up roofing system are often elusive, remaining hidden until severe damage has occurred to the roofing system and building structure. When a layered roofing system such as this develops multiple leaks, the likely course of action is to replace the system entirely.

To learn more of the installation process, benefits, cost, warranty, and potential problems with a Built-up roofing system, read the Built-up Roofing System (BUR) Explained article.

Modified Bitumen (ModBit) 15 – 25 Years
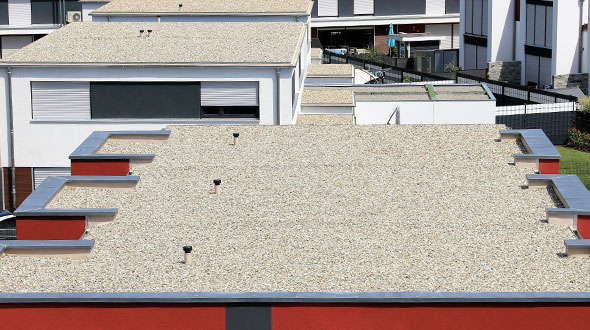
Modified bitumen roofing system repair and replacement

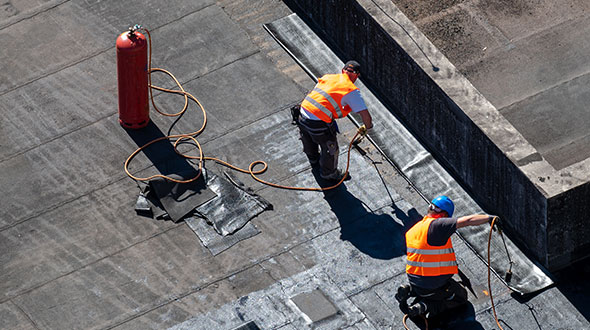
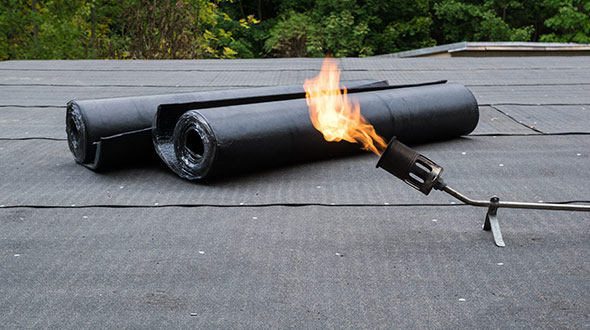
Modified Bitumen (ModBit) roofing is an asphalt-based roofing system similar to Built-up-Roof (BUR) and is designed for structures with low-slope or flat roof structures. Its five layers of protection make this roofing system one of the most trusted in the industry today.

Location, maintenance, and roof design are influencing factors on this system’s longevity. This roofing system can last an average of 15 years with minimal maintenance and care. When properly installed and maintained, a ModBit system can last up to 25 years before needing replacement.

Very similar to BUR, signs that a ModBit roof replacement may be necessary include:

  • Multiple leaks
  • Chronic ponding
  • Severe weather or impact damage

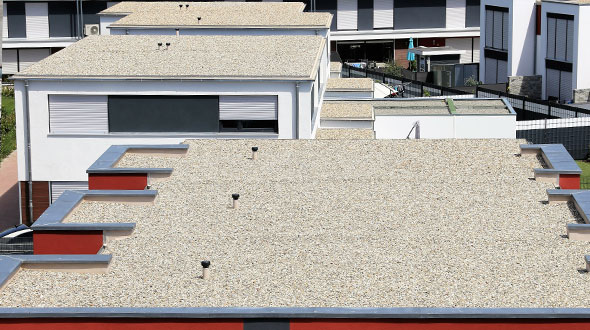
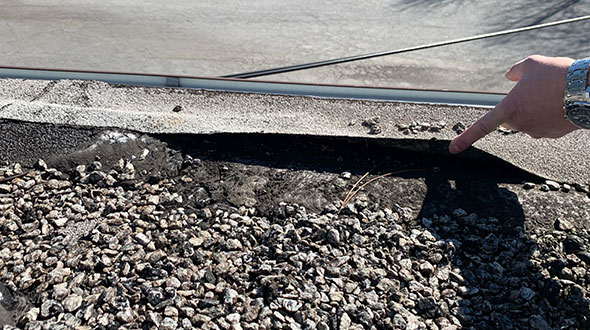
Note 1:When this or other flat roofing systems are ballasted with gravel or stone, repairs will often require the removal of that gravel or stone. This process may ultimately require the partial or complete replacement of the roofing system.

Note 2: A common and barely noticeable problem with ModBit roofing systems involves vibrations from mechanical equipment causing mechanical fasteners to loosen and back out, leaving holes in the membrane. As this condition progresses, severe water damage including rusted components, substrate or decking deterioration, leaks, and costly structural damages occur and can remain virtually unnoticed until a partial or total failure of the roofing system.

Note 3: Roof coatings are commonly applied to aging roofing systems to extend their lifespan. In doing so, a roof coating may fail, allowing slow leaks to develop and remain undetected until severe structural damages occur. These damages become evident as interior leaks, sagging areas in the roof, severe ponding, and roofing system failure if left to develop.

To learn more about the modified bitumen product, benefits, warranty, cost, and potential problems with this roofing system, see this Modified Bitumen Roofing System Explained article.

Metal Roofing Up to 70 Years
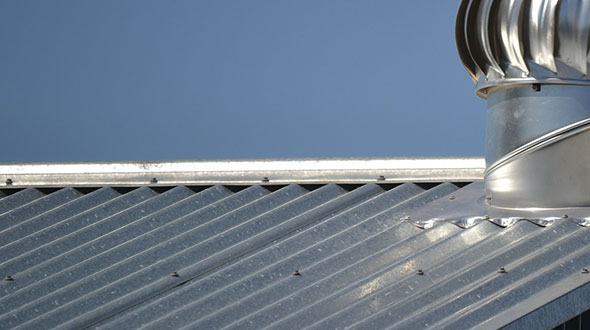
Metal roofing system repair and replacement

Metal or tin roofing is a popular roofing system around the United States and in Canada. The term “tin” is used interchangeably with metal, steel, or galvanized steel roofing. However, tin is an incredibly rare element and unused for roofing.

This incredibly durable roofing system can last an average of 25 to 40 years with minimal maintenance and care. When properly installed and maintained, a metal roofing system can last up to 70 years before requiring replacement.

Signs that a metal roof replacement may be necessary include:

  • Multiple leaks
  • Rusting components
  • Multiple damaged panels
  • extensive weather or impact damage

Note: Due to the expansion and contraction of metal roofing, fastening and anchoring systems can weaken and fail over time. This problem can result in complete roofing system failure and is often only detected during routine maintenance visits.

To learn whether this type of roof suits your needs, read Metal Roofing Advantages and Disadvantages.

Clay Tiles 50 – 75 Years
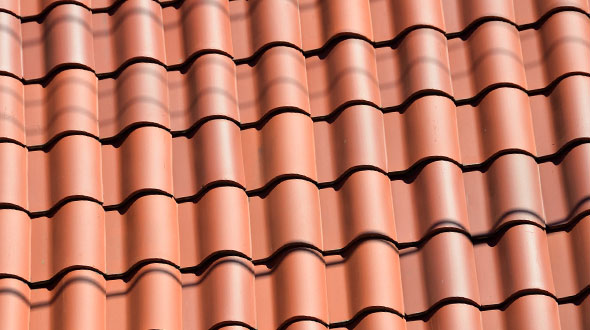
Clay tile roofing system repair and replacement

In use since the 17th century, clay tiles are made by baking molded clay. Tile density is determined by heating time and at what temperature. Known for their ability to withstand high winds, hail, and fire, these tiles are produced in white, yellow, orange, and brown shades.

A clay tile roofing system can last an average of 50 years. With proper installation and maintenance, a clay tile roofing system can reach 75 years before replacement is needed. In rare cases clay tile roofing can even reach a whopping 100 years.

Signs that a clay tile roof replacement may be necessary include:

  • Multiple cracked, damaged, or missing tiles
  • Roofing system sagging
  • Severe weather or impact damage

Note: While clay tile roofing systems can be long-lived, flashing failures (corrosion or cracking), and fastener failures (rusting) often result in water damage to the roof's decking and multiple leaks in the structure below. This type of damage can remain dangerously elusive, only appearing during a maintenance inspection or when the roofing system partially or completely fails.

When damages are minimal or confined to a small area, clay tile roofing systems can be easily repaired. More extensive damages will likely require partial or full replacement.

Roofing Maintenance Program
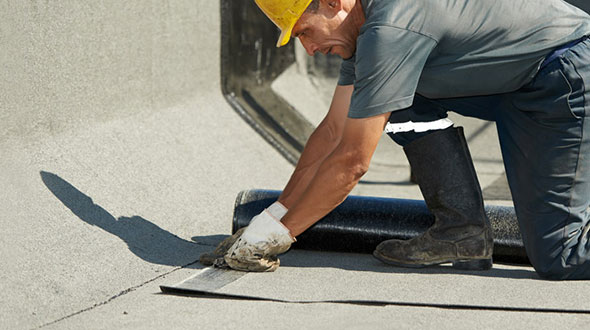
Roofing system maintenance repair and replacement

Roof maintenance plans are provided by commercial and residential roofing contractors, in which they agree to perform scheduled inspections, cleaning, debris removal, and scheduled or recommended preventative roof maintenance.

Acquiring a roofing maintenance program from a licensed roofing contractor allows property owners to protect the roof’s warranty provisions, extend the roof’s lifespan, and ultimately save money by preventing significant damages and costly repairs.

Most roof warranties require a minimum of one roof inspection per year performed by an authorized contractor. These inspections allow early detection of problems and their timely repair before developing into catastrophic problems, leading to a roof’s replacement.

Commercial Roofing Maintenance Programs and Services can greatly extend the life expectancy of your roofing system. If you are beyond repair and in need of a new roof, consider starting a maintenance plan after its replacement; a preventative service will add years to the life of your roof, and considerable savings to your investment.

Commercial And Residential Roof Replacement

In this article, you discovered information about roofing system longevity to help you determine when your roof should be repaired or replaced.

When you know your roof’s projected lifespan, the durability of its materials, and have diligently provided for its care and maintenance, it is likely that your roof will far outlive its life expectancy.

Ignoring your roof and its maintenance needs will sharply abbreviate its lifespan, potentially leaving you with costly repair bills, significant leak damage, and in need of an emergency replacement when it suddenly fails.

Sources:
epdmroofs.org/what-is-epdm/
asphaltroofing.org/bur-multi-ply-built-up-roofing/
energy.gov/energysaver/design/energy-efficient-home-design/cool-roofs

The post When Does a Roof Need To Be Replaced? appeared first on atlantacommercialroofingcontractors.com

Tuesday, February 23, 2021

Commercial Rooftop Deck Construction

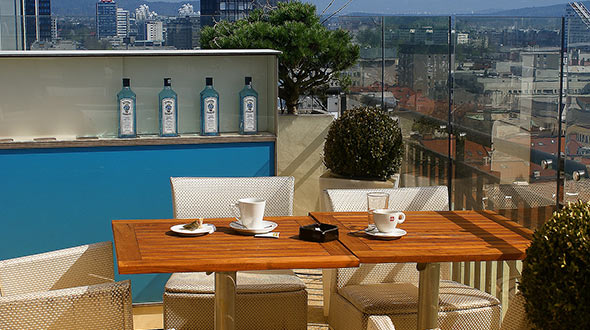
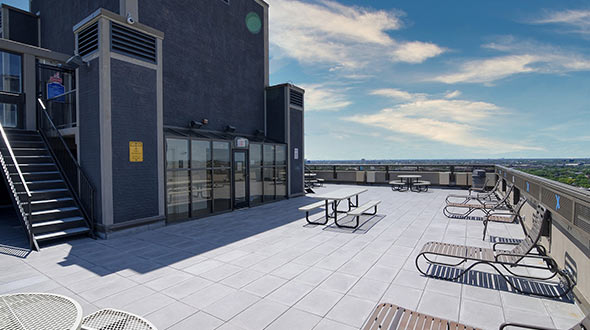
Commercial rooftop deck with lounging furniture and tables

Prevent your commercial rooftop deck from being improperly installed, and discover design ideas and inspirations. By converting your roof or a portion of it into a deck, you can gain a recreation area, lounge or meeting space with a beautiful view.

atlantacommercialroofingcontractors.com outlined below keys to constructing a deck on your commercial rooftop, the steps to ensure it is done correctly, and answers to some frequently asked questions.

Rooftop Decks

Before investing your time and resources into planning a rooftop deck, there are some questions you will need to answer:

Are Commercial Rooftop Decks Permitted in My Municipality? – Contact your local zoning and development or planning department to inform yourself about ordinances for constructing a rooftop deck. Inquire about the following:

  • Are rooftop decks (open or enclosed) allowed in your municipality?
  • Is a building (or other) permit required for this project?
  • Are there any application or permit fees?
  • What documents must be provided with a permit application (blueprints, building/roof inspections, etc.)?

Note: Unlawful building/construction activities can result in costly fines, mandated removal of the construction, and further punitive actions

Will My Commercial Building Support a Rooftop Deck? – There are two numbers you need to know before initiating any type of construction or installation on your roof:

  1. What is your roof’s load capacity?
  2. What is your building’s load capacity?

Load capacity is broken down into several categories. These include:

  • Dead Load (permanent or static structural elements)
  • Live Load (produced by the use and occupancy of the building)
  • Environmental Load (wind, snow, ice, and rain loads)
  • Self-Weight (the weight of the building)

Before plowing ahead, read more about commercial roof load to ensure your new rooftop deck can be properly supported.

Plan Your Rooftop Deck Design

Commercial rooftop deck with restaurant service

Gardens, gazebos, hot tubs, pools, etc. What are you looking for in a rooftop deck? Consider these elements:

  • Plants and trees (green roof)
  • A pergola
  • Seating/Lounging furniture
  • Recreational activities (games)
  • Water (pool, fountain, etc.)
  • Wet bar
  • Kitchen/Grill

Hire a professional designer to help you plan the details of your space, then run the designs by your engineer. The more you plan in the beginning and vet the project using experienced professionals, the better quality material and workmanship you will end up with.

Watch this video to see multiple deck configurations and ideas.

Rooftop Decking and Deck Framing – Of your building installations, a rooftop deck, will most likely be the most punished by sun and weather. When selecting your decking, take the following into consideration:

  • Composite or synthetic decking ranges from wood composites to plastic capped wood composites and cellular PVC. This decking is usually available in a variety of colors.
  • High-density hardwood is an excellent consideration for the rooftop. You can find numerous high-performance hardwood decking species.
  • Softwood decking is not as reliable on a rooftop deck. This decking is more likely to split, crack, and warp. Even the higher-quality softwood decking alternatives, like cedar, require a lot of refinishing. Otherwise, you can expect lots of splitting and warping.

Note: The thicker and more narrow the deck boards are, the better they will perform. Also, the more vertical clearance you have between the top of the roof and bottom of the deck, the better. Spacing between deck boards also plays a critical role in ventilation.

You’ll find that several types of deck framing can be installed:

  • Sleepers are one way that builders have designed to mitigate moisture and the spread of rot. Sleepers are similar to wooden support framework that the deck rests upon.
  • Wood framing is the traditional option and is extremely low-cost upfront. However, this type of framework may exceed your roof load. Another downside is the potential for twisting, warping, and rotting.
  • Aluminum framing (joists) are high performance and perhaps the best option. While this framing requires a higher initial investment, it will not twist, warp, or rot.
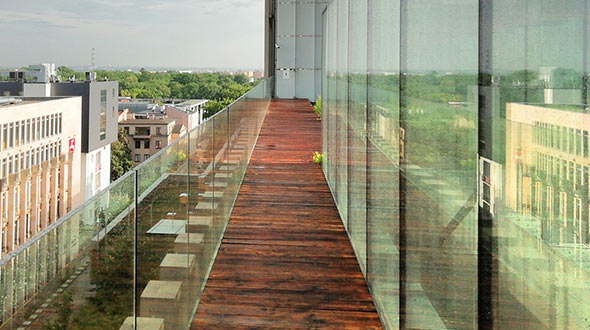
Commercial rooftop deck installed with hardwood flooring

Tip: Request references from your contractors that you can visit. Seeing and walking on a finished deck will help you make informed decisions when selecting your project materials.

Assemble Your Deck Team – One of the more time-consuming activities of your rooftop deck construction will be vetting your contractors. You’ll want to collect a minimum of three bids from multiple contractors, evaluating experience, pricing, guarantees, warranties, references, and overall qualifications. Consider the following:

  • If you don’t already have a commercial roofing company, you will need one to scrutinize your roofing system, verifying that it is leak and problem-free. Some roofing companies are fully capable of installing a rooftop deck.
  • The engineer will help you determine if your roof and building can support your deck’s additional weight.
  • A landscape architect will help you design and place plants, trees, shrubs, and their containers.

Shop around, whether you hire multiple contractors or locate a company that can work “concept to completed installation,” take your time and choose wisely.

Frequently Asked Questions

Question: Does a Rooftop Deck Count as Square Footage?

Answer: Yes, when included in “Rentable Square Footage”(RSF), also known as “Useable Square Footage” (USF).

Question: Does adding a roof deck add value?

Answer: Yes. Adding a rooftop deck can add from $20,000 to $50,000 or more, depending on material, construction, and degree of luxury finishes.

Question: How much does it cost to build a rooftop deck?

Answer: For a basic installation, you can expect to see pricing between $20,000 and $25,000. For more luxurious or elaborate installations, pricing can easily exceed $50,000

Commercial Rooftop Decks

In this article, you discovered essential information about installing a rooftop deck on your commercial building, making sure it’s done right, and answers to frequently asked questions.

Investing in a rooftop deck will add valuable square footage to your building while increasing its overall value.

If you leave your roof undeveloped, you are missing an opportunity to add value to your building and create a unique space otherwise considered “dead space.”

Sources:
fwrc.msstate.edu/housing/images/decks.pdf
faculty.arch.tamu.edu/media/cms_page_media/4198/NS13-1codeloads.pdf
avso.org/interior-design-ideas/roof-terrace-design-ideas-examples-and-important-aspects

The post Commercial Rooftop Deck Construction appeared first on atlantacommercialroofingcontractors.com

Thursday, January 28, 2021

Pros and Cons of Solar Panels for Commercial Buildings

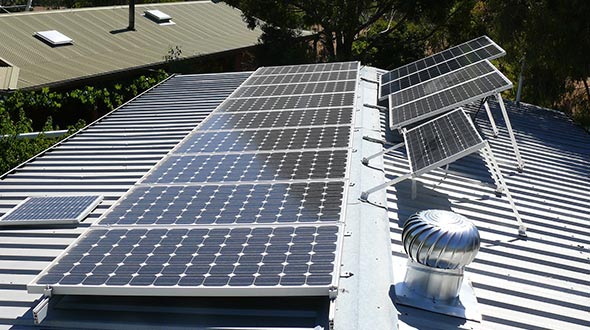
Solar panels installed on a commercial metal roofing system

Avoid paying expensive and erratic electric bills for the operation of your commercial building. Knowing the benefits of installing solar panels on your building will help you make informed decisions when it’s time to switch to solar.

atlantacommercialroofingcontractors.com gathered information on the pros and cons of installing solar panels on your commercial building and answers some frequently asked questions.

Solar Panels for Commercial Buildings

Your commercial building’s flat or sloped roof could be equipped with solar panels, transforming that space into a revenue saving “powerhouse.” Here are the pros of installing solar panels on your commercial building:

Solar Panels Help Your Business Save Money – While installing and setting up solar panels can be quite expensive, these costs are quickly offset by incurring dramatically reduced electricity costs and maintenance fees.

How Much Will Solar Power Reduce My Electric Bill – According to energysage.com commercial property owners can reduce their electricity bill by nearly 90% after installing solar panels.

Converting Your Building to Solar Brings Immediate Marketing Benefits – Installing solar panels on your building allows you to include “green company” in your marketing strategy and branding. As more countries encourage their populations to be less dependent on fossil fuels, your solar panels will make your business a part of a global movement.

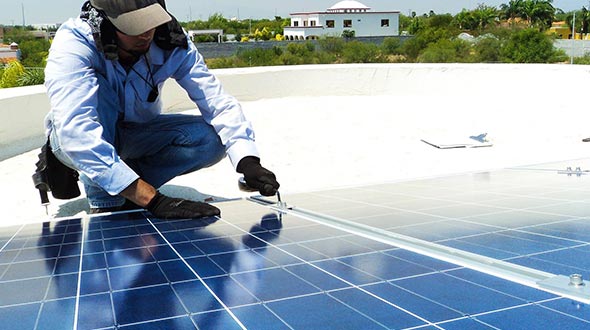
Solar panel installation on a commercial flat roof

Immediately Increase Your Property Value – Once you install solar panels on your commercial building (or in a solar panel garden), your property value instantly increases.

Solar panel capacity is measured in kilowatts, and each kilowatt can be valued in the thousands of dollars. Depending on the capacity of your solar system, your commercial property value may significantly increase. These values vary from state to state.

Installing Solar Panels Unlocks Access to Financial Benefits – The cost of switching to solar energy has dramatically decreased over the past decade and continues to fall as the market expands. Installation and equipment costs can also be offset by state and federal tax credits, rebates, and incentives.

Find policies and incentives by state at dsireusa.org and learn more about federal tax credits at energystar.gov/about/federal_tax_credits/solar_energy_systems

Billing Tenants for Their Energy Usage – If your commercial building has tenants, you can use virtual net metering (VNM) to generate extra revenue by recording the amount of solar energy they use and billing them accordingly.

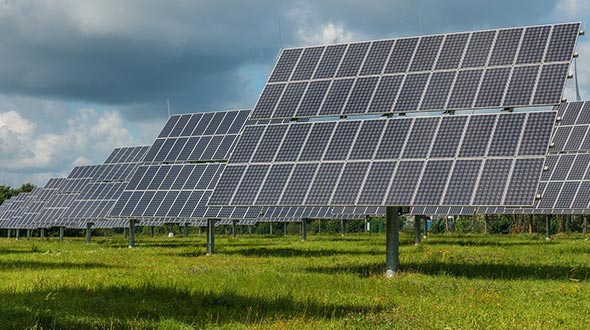
Solar Panel Garden – In cases where your roof (flat or sloped) is too small or cannot support the extra load, solar panels can be installed in a field, parking lot, or other ground space. These ground-level installations are referred to as solar panel gardens.

Solar panel gardens expand energy production and avoid exceeding roof load capacity

Be aware that additional weight / roof load can be problematic and must be considered, read What is Your Commercial Roof Load and Why You Need to Know to determine if adding a solar panel garden is feasible.

Further Energy Savings – If your solar panels produce more energy than your building uses, that excess energy can be stored in batteries or fed back into the power grid. When excess energy is fed back to the power grid, your utility bill receives a credit calculated by the number of kilowatt-hours you gave back.

How Long Do Commercial Solar Panels Last – Commercial solar panels generally have a lifespan of 25 to 30 years. Even after this time, the panels do not stop producing energy. They produce significantly less energy than they did in their prime.

Solar panels produce less energy as they exceed their lifespan

Commercial Solar Panel Installation Cons

While there are numerous advantages to installing solar panels, there are some potential disadvantages, which include:

How Much Do Commercial Solar Panels Cost – While your initial investment can be recovered within a five year period or less, solar panel installation is relatively expensive.

Before incentives and/or rebates, a commercial solar panel system installation can range in cost from $50,000 (25kW) to $200,000 (100kW) and $500,000 (250kW). These costs vary depending on material quality and installation labor.

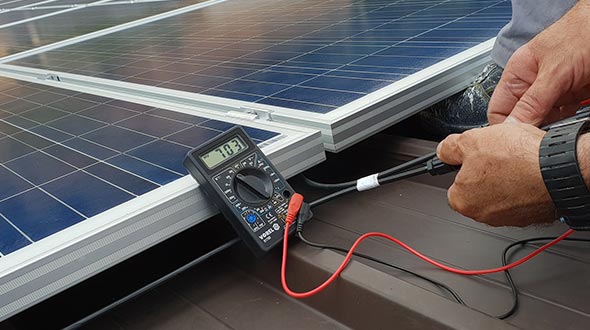
Note: When installing a solar panel system on an existing structure, the electrical system will have to be reconfigured. In some cases, your roof may need to be upgraded, reinforced, or replaced to support the system.

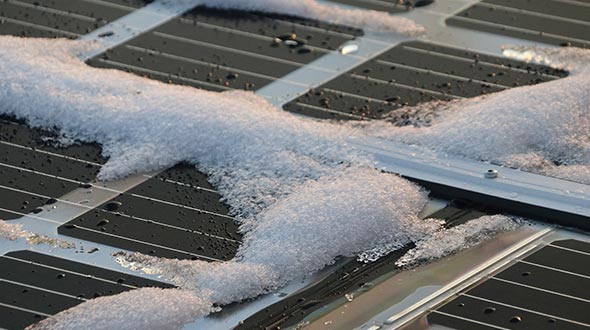
Weather Systems – Solar energy can still be collected on cloudy or rainy days. However, solar system efficiency (dependent on sunlight) is dramatically reduced during these times.

Solar panels are vulnerable to poor weather conditions

Space Requirement – The more energy you want to produce, the more solar panels you will have to install. If the number of solar panels you need exceeds your roof’s size or load capacity, you may have to split the system between your roof and a solar panel garden.

Location Obstructions – Your system may not reach its intended capacity if your location is surrounded by tall trees or buildings.

Before installing a solar panel system, you should carefully consider the system’s pros and cons, have a technician perform a full review of your building, electricity requirements, and look for any obstacles that may render your investment a poor one.

Rooftop Solar Panels

In this article, you discovered significant advantages and disadvantages of installing solar panels on your commercial building’s roof.

Installing a solar power system can benefit your company’s image, reduce your dependency on natural resources, and save significant amounts of money over time.

Your reluctance to convert to solar power will result in your company’s complete dependence on your local power grid and the ever more expensive energy it provides.

Sources:
cpuc.ca.gov/general.aspx?id=5408
sfenvironment.org/sites/default/files/fliers/files/solar_at_multitenant_buildings-virtual_net_metering.pdf
energy.gov/sites/prod/files/2020/01/f70/Guide%20to%20the%20Federal%20Investment%20Tax%20Credit%20for%20Commercial%20Solar%20PV.pdf

The post Pros and Cons of Solar Panels for Commercial Buildings appeared first on atlantacommercialroofingcontractors.com

Monday, December 21, 2020

Chimney Leak Repair

Chimney leaks can be avoided with a proper maintenance contract

Prevent your leaking chimney from causing costly damage to your property. Knowing how to detect and repair a leaking chimney will help you keep your structure dry and safe.

atlantacommercialroofingcontractors.com gathered information on how to identify leaks in your chimney, what causes them, and how to repair them.

Chimney Leaks

Every functioning chimney has one feature in common, a hole in your property. When the engineering of your chimney fails, it can allow water in, sometimes unnoticed. Here’s how to identify a chimney leak:

  • Pooling water near and/or around your fireplace or stove
  • Wet spots or streaks running down the wall near your chimney
  • Wet spots on the ceiling around your chimney
  • Wet framework around your chimney in your attic
  • Water or condensation in the firebox
  • Sound of dripping or trickling water in the chimney
  • Cracked or spalled masonry (internal or external)
  • Musty or moldy odors after a rainstorm

Note: While leaks can pop up at any time, most will develop and become evident in the spring and summer after severe, rainy weather events.

Watch this video to see what brick and mortar problems look like on a chimney.

Chimney Leak Causes

Once you suspect that you have a leaking chimney, such leaks can be traced back to one of the following six installation or material defects:

1. Missing or Poorly Installed Chimney Cap – If your chimney is not covered by a chimney cap, it is poorly installed, or it is too small, rain can enter your flue and fall down the chimney, soaking masonry and brick.

2. Damaged Chimney Crown – The chimney crown is a cement cover atop your chimney that protects flue tiles and chimney liner. When the chimney crown is damaged or cracked, water can cause moisture damage throughout the flue system, fireplace, and damper.

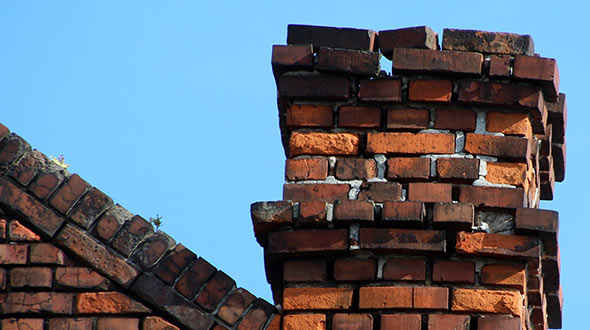
Chimney leaks are common when the chimney is missing its crown and cap

3. Cracked or Missing Chimney Liner – A chimney liner directs combustion byproducts away from your property while protecting the inside of the flue and the chimney’s masonry material from getting soaked by condensation when chimney temperatures cool down.

4. Faulty or Poorly Installed Flashing – Flashing is the material used to seal a chimney’s penetration through a roof. This flashing is supposed to divert rainwater from coming through the roof, eventually damaging your chimney and property.

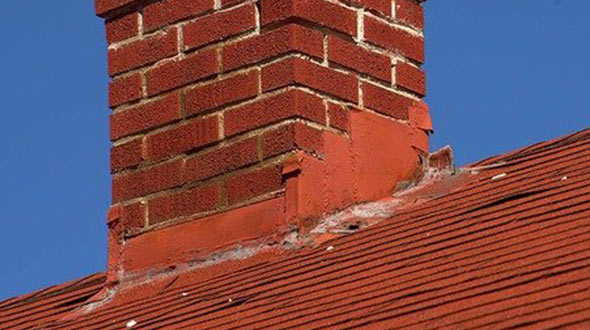
Chimney leaks happen when the flashing deteriorates cracks or peels

5. Brick and Mortar Damage – The exterior portion of your chimney is exposed to all weather conditions, all of the time. Brick and mortar damage can occur from weathering, poor construction, and/or impacts from uncontrolled vehicles or falling trees.

6. Missing or Damaged Chimney Cricket – Another common cause for chimney leaks is ponding water on the penetration’s uphill side. This ponding water can deteriorate flashing, damage brick and mortar, and result in significant roofing system damage. A properly installed chimney cricket creates a sloped high point to divert water that would otherwise pond against the chimney.

Now that you have located the source of your chimney leak, repairs should begin immediately to prevent further damage to your chimney or property.

Repairing Chimney Leaks

Some chimney leaks can be repaired by the property owner, while other repairs may require professional assistance. Consider the following:

1. Installing or Replacing a Chimney Cap – If you can safely get on your roof (only perform this work with proper fall protection), the following steps will help you properly install a chimney cap:

  • Measure the flue at the chimney top
  • Purchase an appropriately sized chimney cap (the bonnet or roof of the cap should be twice as large as the flue opening)
  • Read the instructions and gather the tools you will need
  • Install the chimney cap according to the manufacturer’s instructions
  • Make sure all fasteners are tightly secured, and the cap is securely in place
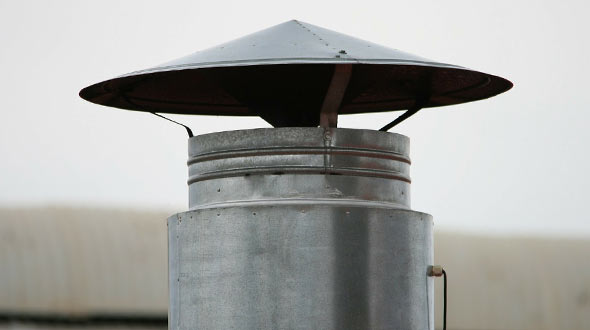
Chimney leaks are common when the cap is defective or missing

Tip: Stainless steel caps are generally higher quality and more durable.

2. Repairing or Replacing a Chimney Crown – This repair can be done as a temporary or permanent fix. Consider the following:

  • (Temporary) Seal a cracked chimney crown with silicone caulking, an elastomeric coating, or other sealants as a temporary fix.
  • (Permanent) Remove the damaged crown, build a wooden form (to hold the cement in place until fully cured), add rebar (to strengthen the crown), and pour a good quality cement mixture into the form and over the rebar.

Note: The temporary fix above will likely last two or three years before failing.

3. Installing a Chimney Liner – Installing or replacing a chimney liner is an easy project for property owners that enjoy DIY projects. (The following configuration will connect to a stove pipe. There are multiple configurations for different chimneys and/or appliances.) The following steps will help you install a new chimney liner:

Step 1 – Gather the tools you will need:

  • Cutting or razor knife
  • Flathead screwdriver
  • Caulk gun
  • Protective work gloves
  • Safety glasses
  • Hacksaw or Electric grinder
  • Power drill

Make sure your tools and equipment are in good working condition.

Step 2 – Assemble the chimney liner kit:

  • Stainless steel chimney liner
  • Connector (some installations may require a two-part tee connection)
  • Top plate
  • Rain cap

Note: Chimney liner kits can be customized to fit any chimney and/or appliance/fireplace.

Chimney leaks can be avoided by replacing the flue liner

Step 3 – Remove the plastic wrap the liner is coiled in. Straighten the liner, making sure to avoid puncturing it. Straighten the liner out as well as you can.

Step 4 – Connect the tee to one end of the chimney liner. Use a tee with a looping hose clamp to avoid drilling screws through the liner.

Step 5 – Insert the liner and tee (tee first) down the chimney flue. Lower the liner until you reach the thimble (the thimble is the hole on the side of the chimney where a stovepipe is attached).

Step 6 – Complete the tee connection installation:

  • Insert the horizontal part of the tee (hose clamp end first) into the thimble.
  • Work the vertical part of the tee through the horizontal hose clamp until the edges of the tee are inside the horizontal section. 
  • There is a worm screw inside the horizontal part of the tee. Tighten the worm screw until the two parts of the tee contact each other.

Step 7 – Connect the stovepipe. Stovepipes typically come with three screws per connection joint. Drive the screws into the horizontal part of the tee and through the stove’s exhaust collar.

Chimney leaks are common when stovepipes are incorrectly installed or connected

Step 8 – Install the top plate:

  • Run a bead of silicone sealant along the top edge of the flue
  • Run the chimney liner through the top plate and place the top plate squarely atop the flue
  • Center the top plate on the flue and secure the top plate by screwing in the locking bolts to the sides of the flue.
  • Cut the excess liner, so it is flush with the top edge of the top plate.
  • Once the liner is cut flush with the top plate, tighten the worm screw, so the hose clamp tightens around the liner.
  • Install the cap over the top plate, and tighten the clamp to secure it in place.

Note: When chimney liners are purchased as a kit, all of the pieces requiring assembly should be fitted, only requiring simple fasteners.

4. Repairing Damaged or Installing New Flashing – Over time, flashing can be damaged by severe weather, material decay, or time. Similar to replacing caulking around door or window joints, scrape away the old caulking and reapply with a sealant. You can also find two-part kits containing a reinforcement fabric and elastomeric sealant. Utilizing a fabric with the sealant will increase its life. This repair, however, will only provide a few years of chimney leak relief.

If your chimney flashing is deteriorating, it is likely that your roofing system may be in decline. Read more about flashing and you will understand its purpose and the various types.

5. Repairing Brick and Mortar Damage – This type of repair requires the replacement of the damaged brick and mortar. Short-term solutions like caulking will only last for a matter of months.

If you are not comfortable with masonry, hire a trusted handyman or contractor to remove and replace damaged or cracked bricks and softening mortar.

6. Replacing or Installing a Chimney Cricket – Replacing and/or installing a chimney cricket is considered a major chimney repair. This repair should only be performed by a trusted chimney service or a professional roofing company.

Watch this video to see a well-installed chimney cricket.

Note: If you have any doubts or difficulties regarding any of the chimney leak causes and/or repairs mentioned in this article, contact a professional chimney service or roofing company to perform the needed repairs.

If after reading the article you have ruled out the chimney and think something else may be causing the leak, read this article to learn 3 other roof leak causes and solutions.

Chimney Leaks and Repairs

In this article, you discovered how to identify chimney leaks, their causes, and how they can be repaired.

By taking swift action to halt and repair chimney leaks, you are protecting your property from extensive water damages and costly repairs.

Ignoring the need to repair your chimney can result in catastrophic damages requiring thousands of dollars in professional repairs.

Sources:
csia.org/fireplace_anatomy.html
putnam.cce.cornell.edu/energy/heating-with-wood/wood-stove-safety
uidaho.edu/-/media/UIdaho-Responsive/Files/Extension/topic/forestry/WFS5-Chimneys.pdf
ideals.illinois.edu/bitstream/handle/2142/54670/1206810_F7_0_1945_chimneys_and_fireplaces_opt.pdf?sequence=2&isAllowed=y

The post Chimney Leak Repair appeared first on atlantacommercialroofingcontractors.com

Monday, November 23, 2020

Commercial Roof Inspection Checklist

Commercial flat roof inspection

Prevent roof failure, business interruption or a forced closure of your commercial property. Knowing how to inspect your roof will help you detect issues before they can interrupt operation or cause property damage.

atlantacommercialroofingcontractors.com gathered information on how to inspect your commercial roof, what to look for, and what actions to take when potential problems are detected.

Commercial Roof Inspection

Regular roof inspections, maintenance, and cleaning can minimize costly emergency roof repairs and significantly extend the life of your commercial roof. Commercial roofs should be inspected at least twice a year (late winter and early fall). If your commercial property has been subjected to high winds, severe storms, tornadoes, hail storms, or hurricanes, it is of the utmost urgency to inspect your roof and/or contract a roofer to inspect it for you.

The following are the primary things to look for when inspecting your roof. Print this roof inspection checklist, then mark the center box with a checkmark for “good” or an X for “needs attention or repair”:

1

Dirt and debris on roof or in drains/gutters


Clear debris with a leaf blower or power washer

2

Visible weather or impact damage


Document damage with photos and/or video

3

Pooling water (ponding) or water stains


Clear any obstructions from drains

4

Flashing 


Note damaged or improperly installed sections

5

Penetrations, skylights, and vents


Note damages in the seal around the protrusion

6

Equipment anchoring


Correct any loosening or damaged anchors

7

Vegetation growth


Remove vegetation and note any damages

8

Mold and mildew growth


Remove and treat to prevent regrowth

9

Signs of vandalism


Document damages and report to authorities

10

Color fading or chalking


Call a professional roofer to evaluate the roof

11

Alligatoring or shrinkage


Call a professional roofer for repairs

12

Damaged seams or seals


Call a professional roofer for repairs

13

Animal infestation or damage


Call animal control then a roofer for repairs

14

Sagging or blistering


Call a professional roofer for repairs

15

Corrosion of metal components


Call a professional roofer for repairs

16

Damage from foot traffic


Limit foot traffic and contact a roofer for repairs

17

Firmness/stability


This may indicate a failing deck/support system. Have the roof professionally inspected

18

Downspouts


Clean or replace if clogged or damaged

19

Signs of leaks on external walls


Inspect the edges of the roof

20

Signs of leaks on internal walls and/or ceiling


These indicate the general area of a problem in the roofing system

Note: Repairing damages on your own may void the warranties covering both workmanship and materials. You can avoid such problems by purchasing a commercial roofing maintenance program from a trusted commercial roofing company.

Tip: The notes you take from multiple roof inspections should be shared with your professional roofer. Your notes may provide valuable insight into the issues you are experiencing.

Commercial Flat Roof Inspections

Commercial flat roofs may be composed of TPO, EPDM, Modified Bitumen, or Built-up (BUR) roofing. These roofing systems should be inspected a minimum of twice a year (late winter and early fall). These inspections will help catch developing damages from summer heat and winter freezes.

These roofing systems should also be inspected after significant or severe weather. Strong, sustained wind and heavy rain can exacerbate even the most innocuously appearing damages or defects. Pay special attention to the following:

  • Membrane wear
  • Stretching
  • Ponding
  • Punctures
Commercial flat roof inspection of water pooling and penetration damages

Commercial flat roof systems can last for decades with proper installation and continuous care.

Tip: While rare, leaks in a BUR system may be challenging to locate. It is highly recommended to bring in a professional roofer to identify and repair such leaks quickly.

Commercial Metal Roof Inspections

Among the various roofing systems, a commercial metal roof may have the longest lifespan. However, without proper maintenance, these roofing systems can quickly develop serious problems. Watch for the following:

  • Corrosion
  • Damaged Panels
  • Damaged fasteners or washer seals

While extremely durable, metal roofing systems still require periodic inspections and occasional repairs.

Commercial metal roof with corrosion and damaged seals

Commercial Sloped Roof Inspections

Commercial sloped roofing systems may be composed of slate, metal, tiles, or asphalt shingles. Like other roofing systems, sloped roofs can wear out over time or suffer significant damages from severe weather. For shingled roofs, consider calling a roofer when:

  • Shingles lose grain
  • Shingles start curling

When extensive wear and tear become evident on asphalt shingles, the roofing system may be nearing the end of its lifespan. For tile or slate roofs, pay attention to:

  • Chips and cracks
  • Missing tiles

Tile and slate roofing systems can be hazardous when cracks occur, or other problems arise. Leave these inspections or repairs to a professional roofing company.

Shingles and tiles on a commercial sloped roof

Inspecting a Commercial Roof

In this article, you discovered what to look for during a commercial roof inspection and how to address problems when they arise.

By knowing how to inspect your roof, you can stop minor issues before they develop into expensive problems.

When you neglect taking care of your roof through inspections and a maintenance program, you are risking expensive damages and potential disruption of business activities.

Sources:
inf.gov.nt.ca/sites/inf/files/roof_inspection_checklist.pdf
nachi.org/documents2012/How_to_Perform_Roof_Inspections_THIRD_EDITION-revd-Dec-2013.pdf

The post Commercial Roof Inspection Checklist appeared first on atlantacommercialroofingcontractors.com

Wednesday, October 28, 2020

Built-up Roofing System (BUR) Explained

Gravel used to surface a BUR roofing system

Don’t invest your resources in an inadequate roofing system for your commercial property. Uncovering the benefits and properties of a built-up roofing system can help you make informed decisions when installing a new roof or replacing your existing roofing system.

atlantacommercialroofingcontractors.com gathered the most helpful information about built-up roofing, its installation process, warranty, associated costs, frequently asked questions, and potential problems with built-up roofing systems.

Built-up Roofing – Production Process & Properties

Built-up roofing systems, referred to as BUR, have been in use in the U.S. for over a century. This roofing system is also known as a “tar and gravel” roof. BUR systems are typically composed of alternating layers of bitumen and reinforcing materials that create a membrane.

This roofing system gains its waterproofing and durability from its layered structure, consisting of a “built-up” or layered combination of components, including:

  1. Substrate or Decking
  2. Roof Insulation
  3. Roofing Asphalt
  4. Venting Base Sheet (Cover Board) with Roofing Asphalt
  5. Ply Sheet with Roofing Asphalt
  6. Slag or Gravel in Asphalt or a Modified Bitumen Cap
asphalt and bitumen used in bur roofing systems

Note: When a modified bitumen membrane is used to cap a BUR system, this combination is referred to as a “hybrid” system.

Roofing asphalt (bitumen) commonly used in BUR systems includes:

Asphalt – Asphalt (a petroleum product refined from crude oil) requires heating before application with a mop or spreader

Coal Tar – Coal tar (derived from the distillation of coal) also requires heating before application with a mop or spreader

Cold-Applied Adhesives – These adhesives are solvent-based asphalts that don’t require heating prior to application

Surfacings used on BUR systems may be (or a combination of):

Aggregate – Gravel, slag, crushed stone, and/or mineral granules are common aggregates

Cap Sheets – Commonly made with glass-fiber or mineral surfacing

Asphalt – Hot Asphalt spread or mopped over the entire surface

Alternative Coatings – Aluminum and elastomeric coatings are commonly applied as surfacing for BUR systems

Benefits of Built-up Roofing

In use for over a century in the U.S., properly installed BUR systems provide the following benefits:

  • Well-installed, a BUR system can last more than 30 years
  • Provides excellent waterproofing protection
  • Creates a continuous sealed surface
  • Seams are very well sealed (in some cases, many times over)
  • Provides exceptional UV protection
  • Once installed, the system is extremely low-maintenance
  • Excellent impact resistance
  • Excellent fire resistance

Along with these benefits is traction. Often overlooked, if your roof has foot traffic, a BUR system may be ideal due to gravel providing an excellent grip. This becomes evident during severe weather.

Built-up Roofing Installation and Warranty

The installation of your built-up roofing system, when properly installed, is a moderately fast and non-intrusive process.

Efficient BUR roofing system installation

A built-up roofing system can be installed using hot asphalt or cold adhesives. A standard built-up roof system is a multiple layered system applied in such a way that creates a seamless roof. The following can influence the end result of the roofing system’s installation:

  • Proper roof slope for efficient draining
  • Correct installation and fastening of insulation
  • Correct application of cold adhesives when used in place of hot asphalt
  • Proper placement and overlapping of material
  • Drip edge seamlessly connected around the perimeter of the roof

In addition to high-quality installation, a warranty is valuable when the installation or components of your roof fail. There are two types of warranties to consider when installing or replacing this or any other roofing system:

Contractor’s Warranty – This warranty covers the workmanship and installation of your roofing system by the contractor. The contractor guarantees their work for a set period (3, 5, 10-year period, etc.), or for the lifetime of the roofing system. A contractor’s warranty should include the following:

  • A list of all covered items
  • Actions or events that may void the warranty
  • When/If the warranty expires

The above installation and warranty information underscore the absolute necessity to thoroughly vet contractors before starting a roofing installation or replacement.

Note: There is no established industry standard for the duration of a contractor’s workmanship warranty.

Manufacturer’s Warranty – This warranty covers defects in the roofing material used in your roofing system. Once installed, your contractor should provide you with manufacturer’s warranty certificates.

An example of material failure would be premature alligatoring (small cracks in the roofing surface from shrinkage). Unless it is determined to result from poor or improper installation, a claim can be leveraged against the manufacturer’s warranty.

Alligatoring of a BUR roofing system caused by inferior material installation

Built-up Roofing Cost

Collecting estimates for a roofing system can be a tedious experience. There is often a significant disparity from one quote to the next, which reinforces the necessity to collect at least three bids from three reputable roofing contractors.

Prices for installing a built-up roof system may vary with the size/complexity of the roof, time of year, material brand and quality, method of installation, and the amount of labor required taken into consideration. You can expect to see pricing in the following ranges:

Tear-off – Unless your new roof is installed over your current roof, the old one will be removed.

This process can range between $100 and $200 per square (1 square = 100 square feet).

Tip: If this cost gets bundled in material and installation pricing. Request that it be detailed separately in your estimate(s).

BUR Material – will fall between $100 and $175 per square

BUR Installation (Labor) – can range from $300 to $525 per square

Maintenance Contract – Commercial roofing maintenance program prices vary from contractor to contractor

Using the price ranges above, you can expect to see bids, including tear-off, material, and installation for a 1,000 square foot roof between $5,000 and $9,000.

Consumer Tip: In the roofing industry, installations are typically more expensive in late spring and summer months. If possible, schedule your installation for the off-season (early spring and fall).

Disclaimer: The above pricing is in no way intended to represent actual bid values and only serves as an estimated market price range.

Built-up Roofing Problems

With new materials, installation methods, and technology, BUR systems are becoming less popular. That said, a built-up roofing system may still be the best option for your commercial building. Before making any decision, consider the following potential problems sometimes associated with a BUR system:

  • High wind may cause rocks or gravel to be blown off the roof (potentially damaging nearby structures or persons)
  • While leaks are easily repaired, finding them may be a laborious and costly process
  • This roofing system is heavy in comparison to others. Your commercial roof load should be verified before installing a BUR system
  • BUR installation is slower than that of other less complex roofing systems. Increased labor costs can make BUR systems more expensive
Poor installation of a BUR roofing system

You must do your research to see if the pros outweigh the cons of this or any other roofing system. You can check out and compare the alternative options to a built-up roof system to find something better suited for your property’s needs.

People Also Ask

Can built-up roofs be repaired?

Yes. BUR roofing systems are easily and reliably repaired.

How long do built-up roofs last?

A well-installed and maintained built-up roofing system can exceed a 30-year lifespan.

Can built-up roofs handle foot traffic?

Yes. Due to the gravel or slag used in the roof’s finishing, BUR systems are slip-resistant, even in severe weather.

Built-up Roofing Information Revealed

In this article, you discovered essential information on the definition, installation, cost, warranty, and potential problems with built-up roofing systems.

Knowing how BUR systems are installed and maintained will help you make informed decisions on a roofing system for your commercial property.

Allowing yourself to be duped into an inadequate roofing system by an unprofessional roofing company can have very costly repercussions when the roof fails.

Sources:
asphaltroofing.org/bur-multi-ply-built-up-roofing/
everybodyneedsaroof.com/built-up-roof-BUR-membranes
homeadvisor.com/cost/roofing/flat-roof/
porch.com/project-cost/cost-to-install-built-up-roofing

The post Built-up Roofing System (BUR) Explained appeared first on atlantacommercialroofingcontractors.com

Thursday, September 17, 2020

Modified Bitumen Roofing System Explained

Modified bitumen roofing system

Avoid spending resources on the wrong roofing system for your commercial property, and learn the benefits and properties of a modified bitumen roof. By knowing its advantages and how modified bitumen roofing systems protect your property or commercial building, you can make informed decisions when replacing your existing roofing system.

atlantacommercialroofingcontractors.com gathered the most helpful information about the modified bitumen product, its installation process, the warranty, material cost, frequently asked questions, and the potential problems with modified bitumen roofing systems.

Modified Bitumen – Production Process & Properties

Modified Bitumen (MB) roofing is an asphalt-based roofing system similar to Built-up-Roofing (BUR), designed for structures with low-slope roofs. Modified bitumen roofing membranes appeared first in Europe in the mid-’60s and since have been used in the US and Canada since the mid-’70s.

This roofing system gains its durability from its structure, consisting of a five-layer combination of components, including:

  • Insulation – Provides thermal resistance and temperature stability.
  • MB Membranes – These membranes are composed of copolymer with polyester or fiberglass reinforcement.
  • Modified-Base sheets – These are modified fiberglass base sheets coated with MB asphalt.
  • Adhesive – Combined with a bonding agent, this waterproofing material is applied hot or cold.
  • Surface – The surface to an MB roofing system increases weather-resistance and shields the roof from ultraviolet rays.

Note: While EPDM roofing material is made from recycled rubber (tires), modified bitumen is made from asphalt and modifying polymer blends.

There are two principal types of MB roofing, including:

APP (Atactic Polypropylene Bitumen) – The use of a thermoplastic polymer gives the asphalt a plastic-like quality. APP modified bitumen increases UV light protection and has greater water resistance.

When APP is torch-applied, the plastic starts melting at 300°F and can be mopped across the roof’s surface, making it easier for roofers to apply.

Modified bitumen app and sbs systems torch applied

SBS (Styrene-Butadiene Styrene) – The addition of styrene-butadiene styrene to bitumen gives it a synthetic rubber modification. When heated, SBS becomes sticky and fundamentally different, lacking the liquid flow of heated APP. Since SBS doesn’t melt the way APP does, it requires less heat, which makes it faster to install.

SBS systems can also be installed using cold adhesives, making it suitable for construction or roofing projects where open flames are prohibited.

Benefits of Modified Bitumen Roofing

Some benefits of a modified bitumen roof include:

  • Tear-Resistant – The principal advantage that MB roofing has over other commercial roofing systems is its tear resistance. This is due to the combination of fiberglass and/or polyester reinforcement layers under its surface. This trait makes modified bitumen roofing an ideal choice for low-slope roofing with high foot traffic or rooftop equipment.
  • Flexible – Flexible low-slope roofing is impact resistant and highly resistant to significant temperature shifts. MB can expand and contract without deforming or losing its structure.
  • Energy-Efficient – MB can be installed with a “cool roof” treatment like solar reflectance, resulting in reduced indoor cooling requirements.
  • Waterproof – Bitumen is naturally waterproof, and on a well-installed roof, MB is one of the most preferred commercial roofing choices.
  • Repair And Maintenance – Repair on an MB roofing system can be done quickly and efficiently using bitumen patches. Low-slope roofing failures usually occur on seals and flashing. However, with proper installation and a roofing maintenance program, such issues should be minimized.


Modified Bitumen Roofing Installation and Warranty

The installation of your modified bitumen roofing system, when properly installed, is a fast, non-intrusive process.

A modified bitumen roofing system can be installed using the torch method, asphalts, or cold adhesives. A standard SBS modified bitumen roof system is a two-ply system applied in rolls overlapping the edge of the previous roll. The following can influence the end result of the roofing system’s installation:

  • Proper roof slope for efficient draining
  • Correct installation and fastening of insulation (when used) to deter bulging and/or sagging
  • Correct application of adhesives (when used) to the substrate
  • Proper overlapping of MB material
  • Drip edge seamlessly connected around the perimeter of the roof

In addition to high-quality installation, a warranty is advantageous and very valuable when the installation or components of your roof fail. There are two types of warranties you should consider when installing or replacing this or any roofing system:

Contractor’s Warranty – This warranty covers the workmanship and installation of your roofing system by the contractor. The contractor can guarantee their work for a set time period (3, 5, 10-year period, etc.), or for the lifetime of the roofing system. A contractor’s warranty should contain the following:

  • A complete list of covered items
  • What actions or events may void the warranty
  • When/If the warranty expires

The above installation and warranty information underscore the necessity to thoroughly vet contractors before starting roofing installation/replacement.

Note: There is no industry standard for the duration of a contractor’s workmanship warranty.

Manufacturer’s Warranty – This warranty covers defects in the material used in your roofing system. Once installed, your contractor should provide you with a warranty certificate(s).

An example of material failure would be premature seam failure or blistering. Unless it is determined to result from poor or improper installation, a claim should be leveraged against the manufacturer’s warranty.

Modified bitumen roofing damaged from severe weather and temperature conditions

Modified Bitumen Roofing Cost

Collecting estimates for any roofing system can be a daunting experience. There can often be a significant disparity from one quote to the next, which validates the absolute necessity to collect at least three bids from reputable roofing contractors.

Prices for installing a modified bitumen roof system vary depending on the size/complexity of the roof, time of year, material brand and quality, method of installation, and the amount of labor required. You can expect to see pricing in the following ranges:

Tear-off – Unless your new roof is installed over your current roof, the old one will be removed.

This process can range between $100 and $200 per square (1 square = 100 square feet).

Tip: If this cost ends up bundled in material and installation pricing. Request that it be detailed separately in your estimate(s).

Modified Bitumen Material – will fall between $150 and $300 per square

Modified Bitumen Installation (Labor) – can range from $220 to $350 per square

Maintenance Contract – Commercial roofing maintenance program prices vary from contractor to contractor

Using the price ranges above, you can expect to see bids, including tear-off, material, and installation for a 1,000 square foot roof between $4,700 and $8,500.

Tip: In the roofing industry, installations are typically more expensive in late spring and summer months. Try to schedule your installation for the off-peak season (early spring and fall) if/when possible.

Disclaimer: The above prices are in no way meant to represent actual bid values and only serve as estimated market price ranges.

Modified Bitumen Roofing Problems

Most problems occurring with modified bitumen roofing systems can be traced back to the roof’s installation. The following are commonly reported issues:

  • Improper roof slope causing water pooling and degradation of materials
  • Seam separation/defects from improper application of adhesives
  • Insulation improperly fastened or installed
  • Blisters that develop when moisture penetrates the material
  • Incorrectly installed flashing
  • Membrane tears/punctures from wind-driven debris

You can avoid problems caused by a poor installation by contracting a roofing company with extensive training and experience with modified bitumen roofing systems.

Tip: Always request references from roofing contractors and followup with those references.

People Also Ask

Can you walk on a modified bitumen roofing system?

Yes. Well-installed MB roofing is designed to withstand foot traffic. For areas that support building equipment or heavier foot traffic, the roof can be appropriately reinforced.

How long do modified bitumen roofs last?

Up to 20 years. The life of your roofing system is significantly influenced by the quality of its installation and maintenance program.

Can modified bitumen roofs be repaired?

Yes. When modified bitumen roofs are damaged, there are several ways they can be efficiently repaired.

Repaired and weathered modified bitumen roofing system

Modified Bitumen Information Revealed

In this article, you discovered information on the definition, installation, cost, warranty, and potential issues with modified bitumen roofing systems.

By knowing how modified bitumen roofing systems are made, installed, and maintained, you can make informed decisions about having it installed on your building.

When you allow yourself to rely solely on what one roofing contractor says or presents, you are leaving yourself vulnerable to costly repairs after having inferior quality materials poorly installed on your building.

Sources:
asphaltroofing.org/cold-adhesive-sbs-modified-bitumen-roofing-applications/
remodelingexpense.com/costs/cost-of-modified-bitumen-roof/
homeadvisor.com/cost/roofing/flat-roof/
citeseerx.ist.psu.edu/viewdoc/download?doi=10.1.1.4.1966&rep=rep1&type=pdf

The post Modified Bitumen Roofing System Explained appeared first on atlantacommercialroofingcontractors.com

Can Roof Shingles Be Painted?

Many property owners wonder whether painting their roof is a viable way to refresh its appearance without the expense of a full replacement....