Showing posts with label Commercial Roofing Companies Near Me. Show all posts

Saturday, December 13, 2025

What is Commercial Roofing?

When you walk into a sprawling warehouse, shop at a retail center, or work in a modern office building, you’re protected by sophisticated roofing systems that operate on an entirely different scale than residential homes. Commercial roofing represents a specialized field that encompasses far more than simple weather protection—it’s about safeguarding business operations, managing energy costs, and maintaining critical infrastructure that keeps commerce running smoothly.

what is commercial roofing

Understanding what commercial roofing entails is essential if you’re responsible for a commercial property. From the materials used to the installation process, maintenance requirements, and long-term costs, commercial roofing systems differ dramatically from residential roofs in ways that directly impact your bottom line and operational continuity.

Definition of Commercial Roofing

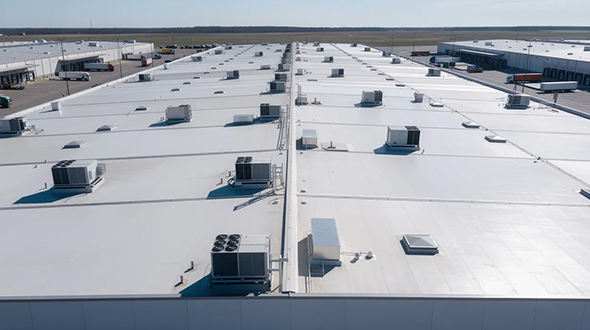
Commercial roofing covers the installation, repair, and maintenance of roofing systems on commercial buildings, warehouses, factories, retail stores, and office complexes. These sophisticated systems protect commercial properties typically exceeding 10,000 square feet and must handle significantly heavier loads than residential roofs ever encounter.

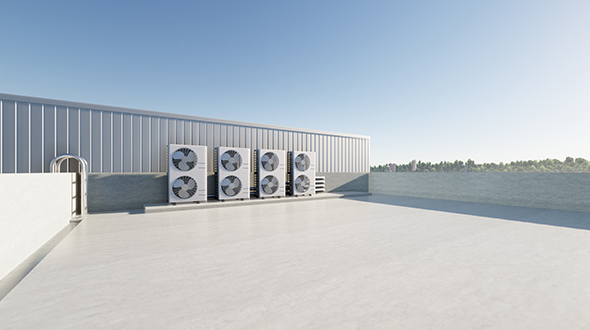
Unlike residential roofs, which primarily focus on aesthetic appeal and basic weather protection, commercial roofs must support substantial HVAC equipment, industrial machinery, and frequent foot traffic from maintenance personnel. A typical commercial building might have multiple rooftop units weighing thousands of pounds, solar panel installations, cooling towers, and regular access for maintenance teams—demands that residential roofs aren’t designed to handle.

The primary purpose extends beyond protecting the structure itself. These roofing systems safeguard business operations, inventory valued at potentially millions of dollars, employees, and customers from weather elements such as rain, snow, hail, and wind. When a commercial roof fails, the consequences ripple through every aspect of business operations, making reliability and durability paramount concerns.

Commercial properties encompass a vast range of building types, from small retail buildings covering 5,000 square feet to massive distribution centers spanning over 500,000 square feet. Each requires a carefully engineered roofing system designed to meet specific performance criteria, building codes, and operational requirements that vary significantly based on the building’s intended use.

How Commercial Roofing Differs from Residential Roofing

The differences between commercial and residential roofing systems extend far beyond simple size considerations, encompassing fundamental design philosophies, structural requirements, and performance expectations that reflect the distinct needs of business versus residential environments.

Design and Structure

Commercial roofs are typically flat or low-slope, with pitches less than 3:12, compared to residential roofs, which feature steep pitches ranging from 4:12 to 12:12. This fundamental difference stems from functional requirements—commercial buildings prioritize maximizing interior space utilization and accommodating rooftop equipment, while residential buildings emphasize aesthetic appeal and efficient water runoff.

large warehouse featuring a flat commercial roof with visible HVAC equipment

Commercial structures span much larger areas, often covering 50,000 to 500,000 square feet, compared to residential roofs, which average 1,500 to 3,000 square feet. This massive scale creates unique engineering challenges, particularly regarding thermal expansion and contraction across vast roof surfaces, structural load distribution, and effective water management systems.

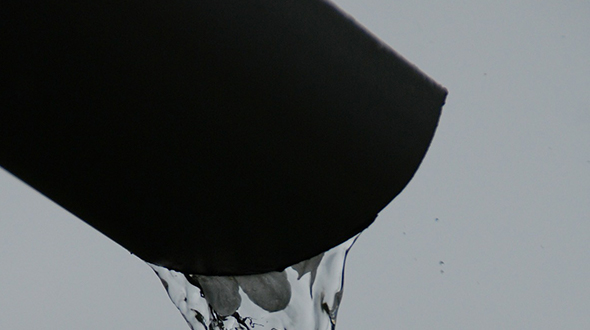
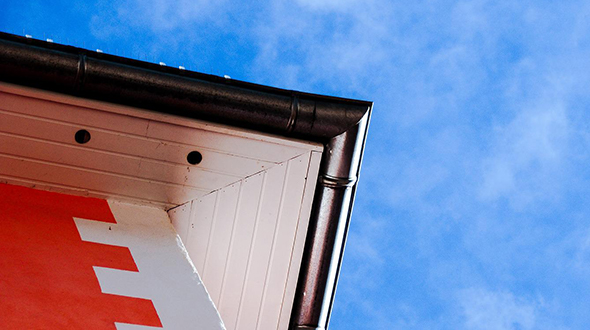
Flat commercial roofs require sophisticated drainage systems, including internal drains, scuppers, and specialized gutters, to prevent water pooling—a critical concern, as standing water can compromise membrane integrity and create structural problems. These drainage systems must handle substantial water volumes during intense storms while preventing backup that could flood interior spaces.

Commercial roofs must support rooftop equipment weighing thousands of pounds, including chillers, cooling towers, exhaust fans, and increasingly common solar panel arrays. This equipment placement requires careful structural analysis and reinforcement, along with accessible maintenance pathways that don’t compromise the roofing system’s waterproof integrity.

Materials Used

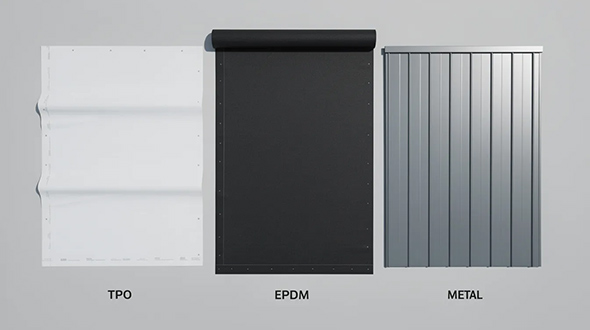
Commercial roofs utilize fundamentally different materials designed for durability, performance, and large-scale application rather than aesthetic appeal. Single-ply membranes like TPO (Thermoplastic Polyolefin), PVC (Polyvinyl Chloride), and EPDM (Ethylene Propylene Diene Monomer) dominate commercial applications due to their ability to cover large areas seamlessly and provide long-term weather resistance.

Modified bitumen systems and built-up roofing (BUR) with multiple asphalt and reinforcement layers remain common for commercial applications where extreme durability and puncture resistance are priorities. These multi-layer systems provide redundancy that single-ply systems cannot match, making them ideal for high-traffic commercial environments.

Metal roofing systems, including standing seam steel and aluminum panels, are designed for large spans and can support substantial loads while providing decades of service life. These systems often incorporate specialized coatings and insulation configurations optimized for energy efficiency in large buildings.

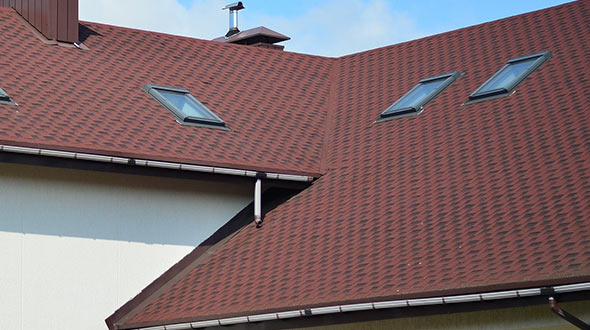
In contrast, residential roofs primarily use asphalt shingles, clay tiles, slate, or cedar shakes chosen for aesthetic appeal and weather protection rather than load-bearing capacity or large-scale performance. While some overlap exists in materials like metal roofing, the specifications, installation methods, and performance requirements differ substantially between residential and commercial applications.

Types of Commercial Roofing Systems

Commercial roofing encompasses several distinct system types, each engineered to address specific performance requirements, building characteristics, and operational needs. Understanding these systems helps property owners make informed decisions about new installations, replacements, and maintenance strategies.

Single-Ply Membrane Roofing

single ply commercial roofing membranes TPO, EPDM, and metal roofing

Single-ply membranes are the most widely used commercial roofing materials for flat roofs, offering efficient installation, proven performance, and energy-efficiency benefits that align with modern building requirements and environmental regulations.

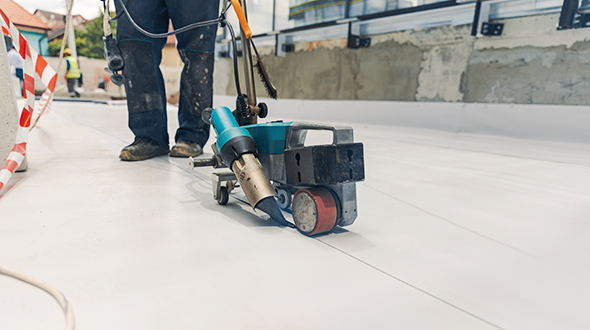
TPO roofing has gained significant market share due to its energy efficiency benefits, featuring white reflective surfaces that can reduce cooling costs by 15-20% in hot climates. These thermoplastic membranes are heat-welded at seams, creating monolithic waterproof barriers that resist wind uplift, chemicals, and UV degradation. TPO systems typically provide a 20-25-year service life with proper maintenance.

PVC roofing membranes offer superior chemical resistance, making them ideal for restaurants, food processing facilities, and industrial properties that are exposed to grease or chemicals. These membranes resist many oils, greases, and chemicals that can degrade other roofing materials, while offering excellent fire resistance and energy efficiency. PVC systems provide exceptional durability in challenging environments.

EPDM roofing delivers outstanding weather resistance and flexibility, maintaining performance characteristics across extreme temperature ranges. Black EPDM absorbs heat, which can benefit heating costs in cold climates but may increase cooling loads in warmer regions. White EPDM formulations address energy efficiency concerns while maintaining the material’s proven durability. EPDM systems can last 25-30 years with proper maintenance.

Installation of single-ply membranes involves mechanically fastening, fully adhering, or ballasting membranes to create watertight seals. Mechanical attachment uses fasteners through insulation into the roof deck, while fully adhered systems use specialized adhesives for complete bonding. Ballasted systems place loose stone over membranes, providing wind resistance through weight rather than attachment.

Built-Up and Modified Bitumen Roofing

Built-up roofing (BUR) systems use alternating layers of bitumen and reinforcement fabric, creating robust multi-ply membranes topped with gravel or mineral cap sheets. These time-tested systems provide excellent redundancy—if one layer develops issues, underlying layers continue protecting the building while repairs are planned and executed.

The installation process involves applying hot asphalt or coal tar between reinforcing plies, building up waterproof membranes in multiple layers. Surface treatments typically include gravel embedment for UV protection and fire resistance, though smooth-surfaced systems with mineral cap sheets are also common. BUR systems excel in high-traffic areas and can withstand heavy equipment installation better than single-ply alternatives.

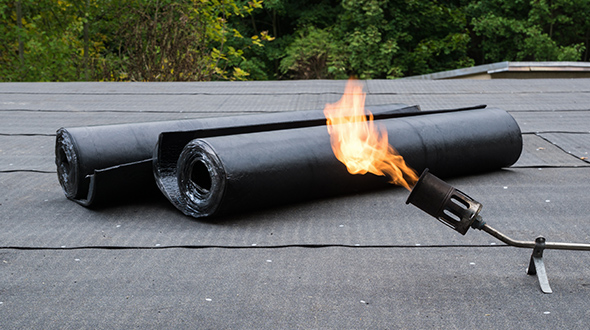
Modified bitumen systems combine traditional asphalt technology with modern polymer science, incorporating rubber or plastic modifiers that enhance flexibility and durability. SBS (styrene-butadiene-styrene) modified systems remain flexible at low temperatures, while APP (atactic polypropylene) modified systems provide enhanced high-temperature performance and UV resistance.

These systems can be installed using torch application, hot mopping, cold adhesives, or self-adhering methods, depending on specific product formulations and project requirements. Multi-ply configurations typically involve a base sheet adhered to the substrate, followed by one or more intermediate plies, and finished with a mineral-surfaced cap sheet.

modified bitumen roofing system installation

Both BUR and modified bitumen systems typically provide service lives of 20-25 years, depending on climate conditions, maintenance quality, and installation workmanship. These systems cost $6-12 per square foot installed, reflecting their labor-intensive installation requirements and robust material specifications.

Metal Commercial Roofing

Metal roofing systems, particularly standing seam systems, offer exceptional longevity and performance for commercial applications. Standing seam systems use interlocking panels that run continuously from eave to ridge, with raised seams that accommodate thermal movement while concealing all fasteners beneath the seams.

Galvanized steel represents the most common metal roofing material, providing excellent strength-to-weight ratios and corrosion resistance when properly coated. Aluminum systems offer superior corrosion resistance and lighter weight, making them ideal for coastal environments or buildings with limited structural capacity. Both materials can support significant snow loads and equipment installations while maintaining structural integrity.

Cool metal roofing incorporates specialized reflective coatings that can reduce energy costs by up to 25% compared to traditional roofing materials. These coatings reflect solar radiation while maintaining high thermal emittance, keeping roof surfaces cooler and reducing air conditioning demands in commercial buildings.

Metal roofing systems provide 40-60 year lifespans with minimal maintenance requirements, making them attractive for long-term ownership scenarios despite higher initial costs. The systems excel in areas with severe weather conditions, providing excellent wind resistance, fire protection, and hail damage resistance.

Installation requires specialized expertise in metal fabrication, thermal movement accommodation, and weather sealing details. Proper installation ensures seams remain watertight throughout decades of thermal cycling while allowing for the substantial movement that occurs across large metal roof surfaces.

Commercial Roofing Installation and Maintenance

Commercial roofing projects involve complex coordination, specialized equipment, and strict adherence to safety protocols that distinguish them from residential installations. The scale, complexity, and performance requirements of commercial properties demand professional expertise and comprehensive planning throughout the project lifecycle.

Installation Process

commercial roofing crew installing TPO membrane installation

Commercial roof installations require specialized equipment, including cranes, hot air welders, material hoists, and safety systems designed for large-scale operations. Projects typically require 1-4 weeks, depending on building size, weather conditions, and system complexity, with detailed scheduling to minimize business disruption during installation.

The installation process begins with thorough substrate preparation, including structural assessments, removal of the existing roof when necessary, and deck repairs or modifications to meet current building codes. Insulation installation follows, with commercial buildings typically requiring R-25 to R-30 insulation values in most climate zones to meet energy efficiency requirements.

Installation must comply with stringent building codes, fire ratings, and wind uplift requirements specific to commercial structures. These requirements often exceed residential standards significantly, particularly regarding fire resistance classifications and wind uplift ratings that can exceed 90 pounds per square foot in high-wind zones.

Quality control throughout installation involves multiple inspections, testing of membrane seams, verification of fastener patterns, and documentation of all system components. Many commercial roofing projects require third-party inspections and testing to validate warranty compliance and building code conformance.

Weather coordination becomes critical for commercial installations due to project scale and exposure duration. Contractors must have contingency plans for precipitation protection, wind limitations for crane operations, and temperature requirements for membrane installations and adhesive applications.

Maintenance Requirements

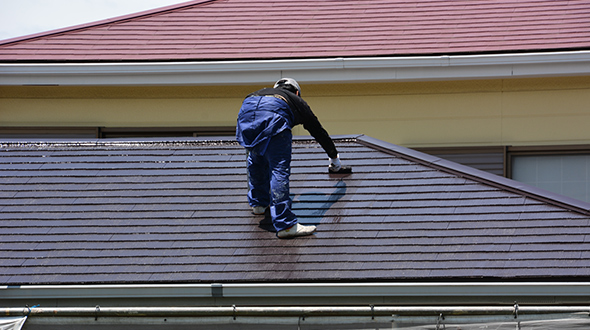
Commercial roofs require professional inspections twice annually—typically in spring and fall—to identify potential issues before they develop into costly problems. These comprehensive inspections examine membrane surfaces, seams, flashings, drainage systems, and rooftop equipment interfaces for signs of deterioration or damage.

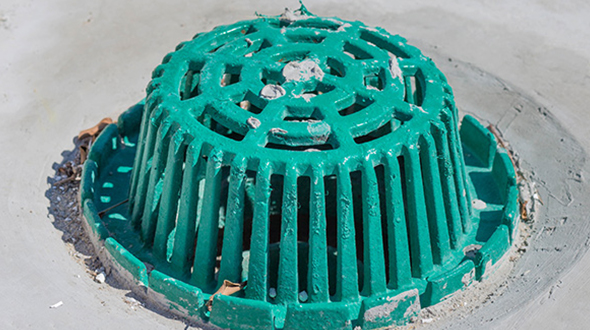
Regular maintenance includes cleaning debris from drains and gutters, inspecting membrane seams for separation, checking flashing around penetrations, and ensuring rooftop equipment hasn’t compromised membrane integrity through vibration or improper installation practices. Drainage system maintenance is particularly critical, as clogged drains can cause ponding water that accelerates membrane aging and creates structural concerns.

Preventive maintenance programs can extend roof service life by 50% while preventing approximately 85% of potential leaks when properly implemented. These programs include scheduled inspections, minor repairs, resealing of flashings, and proactive replacement of deteriorating components before failure occurs.

preventive roof maintenance program

Emergency repairs must be addressed within 24-48 hours to prevent interior damage and business disruption. Commercial roofing contractors maintain emergency response capabilities, including temporary waterproofing systems that can protect interior spaces while permanent repairs are planned and executed.

Documentation of all maintenance activities, repairs, and inspections is essential for warranty compliance and asset management planning. Many commercial property owners maintain detailed roof condition databases that track performance trends, maintenance costs, and replacement timing for budgeting purposes.

Why Specialized Commercial Roofers Are Necessary

The complexity and specialized nature of commercial roofing systems demand contractors with specific training, experience, and capabilities that extend far beyond general construction or residential roofing expertise. These requirements reflect the critical nature of commercial roofing systems and their impact on business operations.

Commercial roofers require extensive training in fall protection systems, OSHA safety protocols, and safe working procedures around industrial equipment and occupied buildings. Working on commercial properties often involves complex safety coordination with ongoing business operations, requiring contractors who understand how to minimize disruption while maintaining strict safety standards.

Understanding building codes, fire ratings, and structural load requirements for commercial applications requires specialized knowledge that general contractors typically don’t possess. Commercial buildings must meet stringent performance standards for wind uplift resistance, fire classification, and energy efficiency that demand expertise in system design and installation methods.

Commercial roofing contractors carry substantially higher insurance coverage—typically $2-5 million in liability protection—due to project complexity, property values, and potential business interruption costs. This insurance reflects the higher risks associated with commercial work and provides property owners with protection against potential failures in installations or materials.

Experience with specialized techniques like membrane welding, modified bitumen installation, and complex flashing details is essential for quality workmanship. These skills require extensive training and practice that residential roofers typically don’t develop, as the techniques and materials are specific to commercial applications.

Commercial contractors also maintain relationships with specialized manufacturers and suppliers, ensuring access to commercial-grade materials and technical support throughout project execution. These relationships often include manufacturer training certifications that validate installer qualifications for warranty compliance.

Commercial Roofing Costs and Considerations

Commercial roofing represents a significant capital investment that requires careful financial planning and analysis of long-term costs versus benefits. Understanding the factors that influence costs helps property owners make informed decisions about system selection, contractor choice, and timing of replacement projects.

Commercial roofing costs range, depending on materials, building height, accessibility, and project complexity. This broad range reflects the substantial differences between basic single-ply installations and complex multi-story projects with extensive rooftop equipment and challenging access requirements.

TPO and EPDM roofing systems are popular choices for cost-conscious property owners who need reliable performance without premium pricing. These systems provide good value through proven durability, energy efficiency benefits, and relatively straightforward maintenance requirements.

Metal roofing systems have a higher material costs and specialized installation requirements. However, metal systems often provide superior long-term value through extended service lives, minimal maintenance requirements, and excellent energy efficiency, which can offset higher initial costs.

Several factors significantly impact project costs beyond basic material selection. Roof accessibility affects labor costs and equipment requirements, with high-rise buildings or complex roof configurations requiring specialized equipment and additional safety measures. Existing roof removal adds to project costs when complete tear-offs are necessary.

Insulation upgrades often accompany commercial roof replacements, particularly when buildings need to meet current energy codes. Insulation costs range depending on thickness and material selection, but energy savings often justify these investments through reduced utility costs over the roof’s service life.

commercial roofing

Commercial roofing projects represent major investments ranging from $50,000 for small retail buildings to over $500,000 for large distribution centers or office complexes. This investment scale requires careful contractor selection, thorough contract review, and comprehensive warranty evaluation to protect the property owner’s interests.

Financing considerations often influence project timing and scope, with many property owners coordinating roof replacements with other building improvements to maximize efficiency and minimize business disruption. Lifecycle cost analysis becomes critical when comparing system options, as seemingly expensive systems may provide superior value over 20-30 year analysis periods.

Selecting a professional roofing contractor with commercial expertise, proper licensing, insurance coverage, and manufacturer certifications is essential to protecting this substantial investment. Quality installation directly impacts system performance, longevity, and warranty compliance, making contractor selection as important as material choice for long-term success.

When evaluating commercial roofing options for your property, consider working with experienced commercial roofing contractors who can provide detailed proposals, lifecycle cost analysis, and comprehensive warranty coverage. The complexity and investment level of commercial roofing systems make professional expertise essential for achieving optimal results that protect your business operations for decades to come.

Atlanta Commercial Roofing Contractors

Atlanta, GA
(404) 220-9288

The post What is Commercial Roofing? appeared first on atlantacommercialroofingcontractors.com

Wednesday, April 20, 2022

Flat Roof Drainage Systems Explained

Commercial roofing drain system

Avoid structural damage to your building due to your flat roof drainage system failing to do its job. Knowing how flat roofing systems drain will help you determine a course of action when yours stops working.

atlantacommercialroofingcontractors.com gathered the following information about flat roof drainage systems, their pros, and their cons.

How Do Flat Roofs Drain?

Flat roofs don’t benefit from sloped roofing systems and gravity to assist them with water removal. They require a drainage system to help remove and channel the water. There are three flat roof drainage systems that work in perfect harmony with flat roofs, and each one has its pros and cons:

Scuppers

Commercial flat roofing scupper drainage system

Scuppers are found on many commercial and residential flat roofs. Scupper drains are equally effective and important as other drain systems. Special attention should be given to their location and installation on flat roofs.

What is a scupper? Scuppers are drain openings placed in low-lying areas on the side of a roof for water drainage. A scupper can be installed through a side wall or a parapet wall.

Scupper Pros:

  • No leaf or debris build-up, everything washes away from or blows off the roof
  • Water shoots away from the building instead of down the side
  • Can add architectural/curb appeal to the roofline with custom-built or molded scuppers
  • Minimal cost
  • Easy to almost no maintenance required
  • No clogging issues if the scupper is large or wide enough

Scupper Cons:

  • If downspouts are installed below your scuppers, they will need to be checked and cleaned regularly since they can easily clog.
  • Scuppers may not be as effective in severe downpours and seasonal snowmelt.

Scuppers can be easily installed and maintained by your roofing company.

Gutters

Commercial flat roofing gutter drainage system

The majority of roofing systems are installed with a gutter system for water drainage. This is the most popular drainage system with the goal of draining water from the roof, moving it to the ground, and ejecting it away from the structure’s foundation.

Don’t be misled to think that gutters are not effective for a flat roofing system. Though flat roofs are nearly level in comparison with pitched roofing systems, they are not entirely flat.

They do possess very low slopes that help them drain water. Gutters can collect the water that naturally falls off your roof into an open gutter system. They then channel the water off and away from the home or commercial building. Gutter systems are by far the most cost-effective drainage solution for flat roofs, but they require regular cleanings and periodic maintenance for the best results.

Gutter Pros:

  • Inexpensive and common, gutters are the easiest drainage system to find, customize, and install.
  • This system helps divert water from inconveniently pouring off the roof in heavier rains, protecting walls, doorways, and windows.
  • Gutters, with their downspouts, work wonders in keeping water away from the structure, preventing severe water damage.

Gutter Cons:

  • Gutters typically pull away from fascia boards with time.
  • Gutters are highly susceptible to debilitating damage from ice, heavy debris, and severe weather.

Gutter drainage systems should be maintained and cleaned multiple times per year (especially prior to and after the rainy season in your region).

Interior Drains

Commercial flat roofing drainage system

This type of drainage system is often found on the roofs of large buildings, but it may also be used for residential homes. These drain systems are typically built into the structure before the roofing system is installed on it. In this respect, they are like a sink or shower drain. They use an interior system of pipes, are typically found below the roof, and carry water away from the home’s foundation. These drains are commonly located in the center of the roof.

Interior Drain Pros:

  • The pipe system is protected by the roof and walls of the building. This minimizes risks of pipe bursts, failure, cracking, or freezing.
  • This flat roof drainage system effectively protects your walls and foundation from suffering any severe water damage.
  • This drain system is somewhat customizable and can easily boost your curb appeal with custom fittings.

Interior Drain Cons:

  • Interior drain installation is the costliest of all flat roof drainage systems.
  • While these drains are less susceptible to damage or clogging, you will need to have a professional roofing technician or a certified plumber make any repairs to damage that may occur.
  • You’ll need to remain cautious since debris can easily clog up the system. Installing strainers/filters and routinely checking the system can help prevent blockages. If ignored, you may have to deal with standing water on your roof.

The Right Drainage System for Your Flat Roof

Any of these systems can effectively divert water from your flat roof, provided it is correctly installed and properly maintained. It’s important to strongly consider each drainage system’s strengths and weaknesses before making your decision, including cost, durability, and maintenance requirements. When in doubt, consult your roofer and consider your building type and location to help you come up with the best drainage system for your flat roofing system.

Flat Roof Drainage

In this article, you discovered three of the ways flat roofing systems efficiently drain and expel rainwater and snowmelt.

Knowing how your roofing system drains water away can help you determine when your roof may need maintenance, cleaning, and even repairs.

Ignoring your roofing system’s drains can lead to severe structural problems and costly repairs when they stop functioning correctly.

Sources:
web.mit.edu/parmstr/Public/NRCan/CanBldgDigests/cbd151_e.html
digitalcommons.calpoly.edu/cgi/viewcontent.cgi?referer=&httpsredir=1&article=1069&context=aen_fac
extension.psu.edu/rainwater-cisterns-design-construction-and-treatment

The post Flat Roof Drainage Systems Explained appeared first on atlantacommercialroofingcontractors.com

Monday, November 22, 2021

18 Parts of a Roof and What They Do

Numerous residential roofing components work together to fully protect a home

Without knowing the basic components when having your roof repaired or replaced, an unscrupulous roofer can take advantage and charge you more money than necessary. Knowing the various parts that compose a roofing system will help you understand the work being done, and ensure you are treated fairly.

atlantacommercialroofingcontractors.com gathered the following information to help you gain a deeper understanding of the complexity and needed parts of your home’s roofing system.

Parts of a Roof

The following are 18 parts of a shingle roofing system and their purpose:

1 – Ridge Board

This is the wooden or metal board that runs along the peak of the roof. Rafters and trusses connect to the ridge board, creating a cohesive framework for the roof.

2 – Collar Beam

A collar beam is a horizontal beam that connects two rafters that intersect at the ridge.

3 – Solid Decking

This decking is composed of solid materials, is strong and stable for bearing potentially heavy loads.

4 – Rafter

Rafters connect to the ridge board and support the roof deck and its load

One of the multiple diagonal members of the truss that meet at the apex to support the roof deck and its load.

5 – Felt Underlayment

This layer of material is a waterproofing layer made of regular felt. It is stacked above the solid decking board and then covered by shingles or preferred roofing materials.

6 – Shingles

Shingles are the roof covering typically flat and cut or molded into rectangular shapes. Shingles can be made of multiple materials like slate, wood, stone, plastic, metal, and composite materials.

Suppliers can offer shingles in a wide variety of shapes, sizes, and colors.

7 – Chimney

A chimney and its flashing work together to remove dangerous gases from your home and prevent leaks from rainwater

The vertical structure penetrating through the roof that is responsible for safely ventilating smoke and combustion or residual gases from a fireplace, boiler, or stove (wood-burning or gas equipped) to the outside environment.

8 – Chimney Flashing

A waterproofing seal installed at the penetration point of the chimney through the roof and used to prevent moisture infiltration.

A small structure called a cricket may also be installed on the raised side of the chimney to prevent moisture and debris from gathering and damaging the roof or chimney.

9 – Vent Pipe Flashing

This installation is weaved or layered into the shingle pattern preventing damage from water seepage into the roofing system.

10 – Spaced Sheathing

Spaced sheathing, also called skipped decking, refers to the type of decking identified by boards running horizontal to the rafters with a 4”- 6” space between them.

11 – Valley Underlayment

This waterproofing layer protects roof valleys from ice and water damage.

12 – Valley Flashing

Valley flashing is a waterproofing seal installed along valley lines.

13 – Lookout

A lookout, lookout rafter, or roof outlooker is a joist that extends in cantilever out from the exterior wall (or wall plate) of a structure, supporting the roof sheathing and providing a nailing surface for fascia boards. When not exposed, it can serve to fasten the finish materials of the eaves.

14 – Fascia

The fascia is the often attractive board along the side of the overhang and the roof that helps your roof have a completed appearance. Your gutters will sit atop your facia board. The fascia is sometimes called a “transition trim” between the home and the roofline.

15 – Rake

A rake board covers the top edge of siding where it meets the roof or soffit if there is an overhang on the gable end. A rake prevents rain from running behind it.

16 – Gutter

Gutters channel rain and melting snow away from the roof and building.

Gutters are the horizontal metal (typically aluminum) part of the water drainage system that are usually installed along the eave edges of your roofing system, or along roof features like dormers. Gutters are open at the top to collect rainwater flowing off the roof, then directing it into the downspouts.

17 – Down Spout

The primary job of gutters and downspouts is to collect water from the roofing system during rainstorms (or from melting snow) and safely divert it away from the foundation of the structure.

18 – Splash Block

Splash blocks are rectangular pieces of plastic or concrete located beneath the end of downspouts. Splash blocks are used to direct water as far away from a structure as possible while preventing soil erosion, eventually causing foundation issues.

While there are many more components that compose a roofing system, knowing the 18 listed above will give you sufficient dialog to properly address and negotiate eventual roof repairs or replacement.

Understanding What Makes a Roof

In this article, you discovered 18 roofing components that are fundamental to the proper functioning of a sloped, shingle roofing system.

The ability to address your roofing system issues directly with your roofer in clear and concise vocabulary will help you get the work done that you need.

Not knowing how to communicate your roofing system issues clearly can result in expensive, unneeded repairs, compounding existing problems, or the risk of being taken advantage of and overspending.

Sources:
goconstruct.org/why-choose-construction/whats-happening-in-construction/what-are-the-different-parts-of-a-roof-and-what-do-they-do/
checkbook.org/v2/docs/roofers/all-areas-roofers-parts-of-a-roof.pdf
asphaltroofing.org/asphalt-roofing-systems-components/

The post 18 Parts of a Roof and What They Do appeared first on atlantacommercialroofingcontractors.com

Thursday, June 24, 2021

Asbestos Roofing Removal

Asbestos roofing system removal

Avoid dangerous exposure to carcinogens when your asbestos roofing system needs replacing. Knowing what to look for, then how to test and safely remove a residential or commercial roofing system that contains asbestos will offer an enormous peace of mind, and reduce your risk or liability.

atlantacommercialroofingcontractors.com gathered the following information about what to do when your roofing system containing asbestos gets damaged or fails, the dangers of asbestos exposure, and resources to help you protect your personal and/or workplace safety.

How Do I Know If My Roofing System Contains Asbestos

The most reliable way to tell if some material contains asbestos is to have a certified asbestos inspector collect samples of suspect asbestos-containing roofing materials and submit them to an analytical laboratory for analysis. Remember, all layers and parts of a roof should be sampled. Asbestos may be in one layer or part and not in another.

Tip: The older your roofing system is, the more likely for asbestos to be present.

What is Asbestos

Asbestos materials used in roofing systems

Asbestos is made up of groups of mineral fibers naturally occurring in rocks and soil. Known for its strength, durability, and resistance to fire and water, asbestos was used commonly in various construction applications for the greater part of the 20th century. Asbestos is a thermal and acoustic insulator. It was used to make combustible objects flame retardant. Asbestos fibers are flexible and elastic, long-lasting, and can be spun or woven.

Asbestos Testing

Before starting any demolition, restoration, or repair work on material suspect of being treated or contaminated with asbestos, testing will help you determine how to proceed. Testing can be accomplished by:

  • Using a commercially available asbestos testing kit
  • Hire a professional, certified asbestos inspector

Tip: The National Voluntary Laboratory Accreditation Program (NVLAP) has an online tool to help you locate an accredited local testing laboratory; access the tool for a local testing lab

Asbestos national voluntary laboratory accredation program online portal

What Roofing Materials May Contain Asbestos?

Before public awareness of asbestos hazards and Federal regulations/restrictions, asbestos was added during the production of roofing materials to strengthen them, increase their durability, and provide some insulation and fireproofing. The use of asbestos in roofing has declined rapidly since the early 1980s.

The following common roofing products may contain asbestos:

  • Adhesives
  • Coatings
  • Decking
  • Felts
  • Shingles (asphalt and concrete)
  • Underlayment
  • Vapor retardants
  • Flashing
  • Mastics
  • Sealants

Why Remove Asbestos Roofing

Several decades ago, asbestos came with a number of construction “conveniences” before awareness of its dangers; it is now accompanied by feelings of concern and terror, as People exposed to the toxin having developed lung cancer, malignant mesothelioma, asbestosis, and other lung diseases and issues.

Why Is Asbestos Bad for My Health

Warning sign asbestos present

The risk of asbestos depends on the type of product in which it has been incorporated and its state of degradation. Asbestos can be hazardous to human health because microscopic particles persist long after being introduced and can be inhaled when released into the air. Asbestos exposure is linked to higher rates of cancer and incurable asbestos-related illnesses.

Asbestos is released into the air in the form of tiny fibers and lodges itself in the lungs. Its indestructible nature makes it difficult or impossible to expel. Lethal diseases, like asbestosis, lung cancer, or mesothelioma (pleural cancer) can develop. The most harmful effects of asbestos and all its symptoms on the human body sometimes do not manifest for 20 years or more after exposure. Asbestos is one of the leading occupational causes of death.

How Can I Be Exposed to Asbestos

Asbestos fibers may be released into the air by the damage or disturbance of asbestos-containing material during product use, demolition work, building or home maintenance, repair, and remodeling. In general, exposure may occur only when the asbestos-containing material is disturbed or damaged in some way that releases particles and fibers into the air.

Adverse Health Effects from Asbestos Exposure

Exposure to asbestos increases your risk of developing terminal lung disease. That risk is exacerbated by smoking. In general, the greater the exposure to asbestos, the greater the chance of developing harmful health effects.

Asbestos-related medical conditions may be challenging to identify. Healthcare providers usually identify the possibility of asbestos exposure and related health conditions like lung disease by thoroughly evaluating one’s background. This includes looking at the person’s medical, work, cultural, and environmental history.

If a doctor suspects an asbestos-related condition, he or she can use multiple tools to help make a more accurate or pinpointed diagnosis. Some of these tools may be a physical examination, chest x-ray, and pulmonary function exams. Your doctor may also refer you to a specialist who treats diseases caused by asbestos.

Three of the significant health effects associated with asbestos exposure are:

  • Lung cancer
  • Mesothelioma, a rare form of cancer that is found in the thin lining of the lung, chest, the Abdomen, and heart
  • Asbestosis, a severe progressive, long-term, non-cancer disease of the lungs

Note: Asbestos treatment specialists may include surgeons, oncologists, and other experts who specialize in treating pleural or peritoneal mesothelioma.

Asbestos Safety Resources

Asbestos requires the use of protective equipment

The following federal resources can help you further understand and adhere to accepted asbestos safety protocols:

Asbestos Roofing Material

In this article, you discovered critical information about how to deal with a damaged or failing roofing system containing asbestos.

Taking swift action to remove or contain damaged asbestos materials will help you protect the health of your visitors, tenants, or neighbors within close proximity.

Neglecting the hazard of damaged asbestos in your roofing system can lead to the inhalation of asbestos fibers and the eventual development of life-threatening respiratory illnesses and/or cancer.

Sources:
epa.gov/asbestos
scdhec.gov/disaster-preparedness/hurricanes-floods/asbestos-removal-safety-homeowners-businesses-after-severe
ehs.msu.edu/enviro/asbestos/asbestos-factsheet.html
ehs.oregonstate.edu/asb-when
cedars-sinai.org/health-library/diseases-and-conditions/m/mesothelioma.html

The post Asbestos Roofing Removal appeared first on atlantacommercialroofingcontractors.com

Wednesday, May 26, 2021

What Is a Soffit – Why You Need It

Soffit fascia and eaves work together to ventilate and protect the attic space under a sloped roofing system

A soffit is a critical component to prevent decay and eventual roof failure due to excess moisture accumulating in your attic. Discover what else your soffit does to help your roofing system meet its intended life expectancy.

atlantacommercialroofingcontractors.com gathered the following information about what a soffit is, its purpose, and why it is essential to your roofing system’s success.

What Is a Soffit?

When a sloped roof descends from the peak to the exterior walls of a structure, the roof will overhang the structure by 1 to 2 feet. Where you have tiles, shingles, or metal roofing on the topside, the soffit is the component underneath the overhang that protects the rafters, attic space, and roof substrate or decking from excess moisture, severe weather infiltration, potential mold growth and helps your roofing system last for the duration of its intended lifespan.

Soffit installation and repair work

What Is The Difference Between Soffits and Fascia?

Soffits and fascia are installed together, forming a barrier between external elements and the attic space created by your sloping roofing system. Looking at a structure at street level, you may say the trim around the foot of the roof looks well-done. This “trim” is the fascia. With the soffit underneath the overhang and the fascia closing the gap between the soffit and the roof, the barrier, as mentioned earlier, is formed. These roofing components:

  • Deter bee, hornet, and other insect infestations
  • Stop wildlife (squirrels, raccoons, cats, etc.) from nesting in your attic
  • Prevent water (wind-driven rain) from getting in your attic
  • Keep your attic ventilated, preventing a buildup of moist/humid air that could lead to mold, mildew, and rotting problems
  • Prevent premature aging of your roofing system

Soffits and fascia, when well-installed, can add to the visual “completeness” of the structure. Thus, adding curb appeal and potentially increasing the property’s overall value.

Note: Gutter systems installed around the foot of a sloped roofing system are typically affixed to the fascia. This is done in a manner that guides water runoff away from the roofing system, doorways, windows, and other vulnerable areas.

Soffit and fascia along a home with gutters and curb appeal

Soffit and Fascia Materials

To complement the construction of your home or type of roofing system, you can find soffit panels and fascia boards made from many different materials and finished in a wide variety of colors and textures.

Soffits and fascia are typically made from materials like:

Aluminum – Lasts 20+ years with colors and texture baked in to prevent fading.
Wood – Depending on the wood and maintenance, lasts 5 to 15 years.
UPVC (Unplasticised Polyvinyl Chloride) – Lasts 10 to 20 years and comes in multiple colors and textures but may fade or become brittle over time.
Vinyl – Similar to uPVC, lasts 10 to 20 years, is available in multiple colors and textures, and can become faded and/or brittle over time.
Steel – Lasts 25+ years with multiple colors and textures that resist fading.
Fibre Cement Board – Lasts 30+ years when properly installed and will never peel, chip, or rot.

Note: As with all roofing materials, the durability of the above-mentioned fluctuates with the quality, thoroughness, and frequency of your maintenance program.

Watch this video to see soffit and fascia trim installation.

Soffit and Fascia Installation and Repair Costs

Generally speaking, you will rarely need to replace all of your soffits and/or fascia. This will usually occur only when your roofing system is replaced.

In cases of roof replacement, soffit and fascia installation (labor and materials) will likely be included in your overall estimate or bid. You can ask for these as detailed line items in your estimate.

Soffit and/or fascia installation or repair will run in the $5 to $25 per linear foot range.

Note: Supply and demand will significantly impact the prices of materials considered commodities (wood materials).

Why Your Home Needs Soffits

In this article, you discovered what soffits are, what they do, and how they contribute to the success and longevity of your roofing system.

Keeping your soffits well-maintained allows them to properly ventilate your home’s attic while keeping moisture, severe weather, and destructive animal or insect infestations from taking years off the life of your roofing system.

Allowing your soffits to deteriorate or go without proper maintenance will lead to severe weather events, animals, insects, and humidity causing sere and costly damage to your roofing system and building structure.

Sources:
energy.ces.ncsu.edu/soffit-defined/
ucanr.edu/sites/Wildfire/Vents/
uvm.edu/~cferreir/131Eave%20Details.pdf

The post What Is a Soffit – Why You Need It appeared first on atlantacommercialroofingcontractors.com

Monday, December 21, 2020

Chimney Leak Repair

Chimney leaks can be avoided with a proper maintenance contract

Prevent your leaking chimney from causing costly damage to your property. Knowing how to detect and repair a leaking chimney will help you keep your structure dry and safe.

atlantacommercialroofingcontractors.com gathered information on how to identify leaks in your chimney, what causes them, and how to repair them.

Chimney Leaks

Every functioning chimney has one feature in common, a hole in your property. When the engineering of your chimney fails, it can allow water in, sometimes unnoticed. Here’s how to identify a chimney leak:

  • Pooling water near and/or around your fireplace or stove
  • Wet spots or streaks running down the wall near your chimney
  • Wet spots on the ceiling around your chimney
  • Wet framework around your chimney in your attic
  • Water or condensation in the firebox
  • Sound of dripping or trickling water in the chimney
  • Cracked or spalled masonry (internal or external)
  • Musty or moldy odors after a rainstorm

Note: While leaks can pop up at any time, most will develop and become evident in the spring and summer after severe, rainy weather events.

Watch this video to see what brick and mortar problems look like on a chimney.

Chimney Leak Causes

Once you suspect that you have a leaking chimney, such leaks can be traced back to one of the following six installation or material defects:

1. Missing or Poorly Installed Chimney Cap – If your chimney is not covered by a chimney cap, it is poorly installed, or it is too small, rain can enter your flue and fall down the chimney, soaking masonry and brick.

2. Damaged Chimney Crown – The chimney crown is a cement cover atop your chimney that protects flue tiles and chimney liner. When the chimney crown is damaged or cracked, water can cause moisture damage throughout the flue system, fireplace, and damper.

Chimney leaks are common when the chimney is missing its crown and cap

3. Cracked or Missing Chimney Liner – A chimney liner directs combustion byproducts away from your property while protecting the inside of the flue and the chimney’s masonry material from getting soaked by condensation when chimney temperatures cool down.

4. Faulty or Poorly Installed Flashing – Flashing is the material used to seal a chimney’s penetration through a roof. This flashing is supposed to divert rainwater from coming through the roof, eventually damaging your chimney and property.

Chimney leaks happen when the flashing deteriorates cracks or peels

5. Brick and Mortar Damage – The exterior portion of your chimney is exposed to all weather conditions, all of the time. Brick and mortar damage can occur from weathering, poor construction, and/or impacts from uncontrolled vehicles or falling trees.

6. Missing or Damaged Chimney Cricket – Another common cause for chimney leaks is ponding water on the penetration’s uphill side. This ponding water can deteriorate flashing, damage brick and mortar, and result in significant roofing system damage. A properly installed chimney cricket creates a sloped high point to divert water that would otherwise pond against the chimney.

Now that you have located the source of your chimney leak, repairs should begin immediately to prevent further damage to your chimney or property.

Repairing Chimney Leaks

Some chimney leaks can be repaired by the property owner, while other repairs may require professional assistance. Consider the following:

1. Installing or Replacing a Chimney Cap – If you can safely get on your roof (only perform this work with proper fall protection), the following steps will help you properly install a chimney cap:

  • Measure the flue at the chimney top
  • Purchase an appropriately sized chimney cap (the bonnet or roof of the cap should be twice as large as the flue opening)
  • Read the instructions and gather the tools you will need
  • Install the chimney cap according to the manufacturer’s instructions
  • Make sure all fasteners are tightly secured, and the cap is securely in place
Chimney leaks are common when the cap is defective or missing

Tip: Stainless steel caps are generally higher quality and more durable.

2. Repairing or Replacing a Chimney Crown – This repair can be done as a temporary or permanent fix. Consider the following:

  • (Temporary) Seal a cracked chimney crown with silicone caulking, an elastomeric coating, or other sealants as a temporary fix.
  • (Permanent) Remove the damaged crown, build a wooden form (to hold the cement in place until fully cured), add rebar (to strengthen the crown), and pour a good quality cement mixture into the form and over the rebar.

Note: The temporary fix above will likely last two or three years before failing.

3. Installing a Chimney Liner – Installing or replacing a chimney liner is an easy project for property owners that enjoy DIY projects. (The following configuration will connect to a stove pipe. There are multiple configurations for different chimneys and/or appliances.) The following steps will help you install a new chimney liner:

Step 1 – Gather the tools you will need:

  • Cutting or razor knife
  • Flathead screwdriver
  • Caulk gun
  • Protective work gloves
  • Safety glasses
  • Hacksaw or Electric grinder
  • Power drill

Make sure your tools and equipment are in good working condition.

Step 2 – Assemble the chimney liner kit:

  • Stainless steel chimney liner
  • Connector (some installations may require a two-part tee connection)
  • Top plate
  • Rain cap

Note: Chimney liner kits can be customized to fit any chimney and/or appliance/fireplace.

Chimney leaks can be avoided by replacing the flue liner

Step 3 – Remove the plastic wrap the liner is coiled in. Straighten the liner, making sure to avoid puncturing it. Straighten the liner out as well as you can.

Step 4 – Connect the tee to one end of the chimney liner. Use a tee with a looping hose clamp to avoid drilling screws through the liner.

Step 5 – Insert the liner and tee (tee first) down the chimney flue. Lower the liner until you reach the thimble (the thimble is the hole on the side of the chimney where a stovepipe is attached).

Step 6 – Complete the tee connection installation:

  • Insert the horizontal part of the tee (hose clamp end first) into the thimble.
  • Work the vertical part of the tee through the horizontal hose clamp until the edges of the tee are inside the horizontal section. 
  • There is a worm screw inside the horizontal part of the tee. Tighten the worm screw until the two parts of the tee contact each other.

Step 7 – Connect the stovepipe. Stovepipes typically come with three screws per connection joint. Drive the screws into the horizontal part of the tee and through the stove’s exhaust collar.

Chimney leaks are common when stovepipes are incorrectly installed or connected

Step 8 – Install the top plate:

  • Run a bead of silicone sealant along the top edge of the flue
  • Run the chimney liner through the top plate and place the top plate squarely atop the flue
  • Center the top plate on the flue and secure the top plate by screwing in the locking bolts to the sides of the flue.
  • Cut the excess liner, so it is flush with the top edge of the top plate.
  • Once the liner is cut flush with the top plate, tighten the worm screw, so the hose clamp tightens around the liner.
  • Install the cap over the top plate, and tighten the clamp to secure it in place.

Note: When chimney liners are purchased as a kit, all of the pieces requiring assembly should be fitted, only requiring simple fasteners.

4. Repairing Damaged or Installing New Flashing – Over time, flashing can be damaged by severe weather, material decay, or time. Similar to replacing caulking around door or window joints, scrape away the old caulking and reapply with a sealant. You can also find two-part kits containing a reinforcement fabric and elastomeric sealant. Utilizing a fabric with the sealant will increase its life. This repair, however, will only provide a few years of chimney leak relief.

If your chimney flashing is deteriorating, it is likely that your roofing system may be in decline. Read more about flashing and you will understand its purpose and the various types.

5. Repairing Brick and Mortar Damage – This type of repair requires the replacement of the damaged brick and mortar. Short-term solutions like caulking will only last for a matter of months.

If you are not comfortable with masonry, hire a trusted handyman or contractor to remove and replace damaged or cracked bricks and softening mortar.

6. Replacing or Installing a Chimney Cricket – Replacing and/or installing a chimney cricket is considered a major chimney repair. This repair should only be performed by a trusted chimney service or a professional roofing company.

Watch this video to see a well-installed chimney cricket.

Note: If you have any doubts or difficulties regarding any of the chimney leak causes and/or repairs mentioned in this article, contact a professional chimney service or roofing company to perform the needed repairs.

If after reading the article you have ruled out the chimney and think something else may be causing the leak, read this article to learn 3 other roof leak causes and solutions.

Chimney Leaks and Repairs

In this article, you discovered how to identify chimney leaks, their causes, and how they can be repaired.

By taking swift action to halt and repair chimney leaks, you are protecting your property from extensive water damages and costly repairs.

Ignoring the need to repair your chimney can result in catastrophic damages requiring thousands of dollars in professional repairs.

Sources:
csia.org/fireplace_anatomy.html
putnam.cce.cornell.edu/energy/heating-with-wood/wood-stove-safety
uidaho.edu/-/media/UIdaho-Responsive/Files/Extension/topic/forestry/WFS5-Chimneys.pdf
ideals.illinois.edu/bitstream/handle/2142/54670/1206810_F7_0_1945_chimneys_and_fireplaces_opt.pdf?sequence=2&isAllowed=y

The post Chimney Leak Repair appeared first on atlantacommercialroofingcontractors.com

Monday, November 23, 2020

Commercial Roof Inspection Checklist

Commercial flat roof inspection

Prevent roof failure, business interruption or a forced closure of your commercial property. Knowing how to inspect your roof will help you detect issues before they can interrupt operation or cause property damage.

atlantacommercialroofingcontractors.com gathered information on how to inspect your commercial roof, what to look for, and what actions to take when potential problems are detected.

Commercial Roof Inspection

Regular roof inspections, maintenance, and cleaning can minimize costly emergency roof repairs and significantly extend the life of your commercial roof. Commercial roofs should be inspected at least twice a year (late winter and early fall). If your commercial property has been subjected to high winds, severe storms, tornadoes, hail storms, or hurricanes, it is of the utmost urgency to inspect your roof and/or contract a roofer to inspect it for you.

The following are the primary things to look for when inspecting your roof. Print this roof inspection checklist, then mark the center box with a checkmark for “good” or an X for “needs attention or repair”:

1

Dirt and debris on roof or in drains/gutters


Clear debris with a leaf blower or power washer

2

Visible weather or impact damage


Document damage with photos and/or video

3

Pooling water (ponding) or water stains


Clear any obstructions from drains

4

Flashing 


Note damaged or improperly installed sections

5

Penetrations, skylights, and vents


Note damages in the seal around the protrusion

6

Equipment anchoring


Correct any loosening or damaged anchors

7

Vegetation growth


Remove vegetation and note any damages

8

Mold and mildew growth


Remove and treat to prevent regrowth

9

Signs of vandalism


Document damages and report to authorities

10

Color fading or chalking


Call a professional roofer to evaluate the roof

11

Alligatoring or shrinkage


Call a professional roofer for repairs

12

Damaged seams or seals


Call a professional roofer for repairs

13

Animal infestation or damage


Call animal control then a roofer for repairs

14

Sagging or blistering


Call a professional roofer for repairs

15

Corrosion of metal components


Call a professional roofer for repairs

16

Damage from foot traffic


Limit foot traffic and contact a roofer for repairs

17

Firmness/stability


This may indicate a failing deck/support system. Have the roof professionally inspected

18

Downspouts


Clean or replace if clogged or damaged

19

Signs of leaks on external walls


Inspect the edges of the roof

20

Signs of leaks on internal walls and/or ceiling


These indicate the general area of a problem in the roofing system

Note: Repairing damages on your own may void the warranties covering both workmanship and materials. You can avoid such problems by purchasing a commercial roofing maintenance program from a trusted commercial roofing company.

Tip: The notes you take from multiple roof inspections should be shared with your professional roofer. Your notes may provide valuable insight into the issues you are experiencing.

Commercial Flat Roof Inspections

Commercial flat roofs may be composed of TPO, EPDM, Modified Bitumen, or Built-up (BUR) roofing. These roofing systems should be inspected a minimum of twice a year (late winter and early fall). These inspections will help catch developing damages from summer heat and winter freezes.

These roofing systems should also be inspected after significant or severe weather. Strong, sustained wind and heavy rain can exacerbate even the most innocuously appearing damages or defects. Pay special attention to the following:

  • Membrane wear
  • Stretching
  • Ponding
  • Punctures
Commercial flat roof inspection of water pooling and penetration damages

Commercial flat roof systems can last for decades with proper installation and continuous care.

Tip: While rare, leaks in a BUR system may be challenging to locate. It is highly recommended to bring in a professional roofer to identify and repair such leaks quickly.

Commercial Metal Roof Inspections

Among the various roofing systems, a commercial metal roof may have the longest lifespan. However, without proper maintenance, these roofing systems can quickly develop serious problems. Watch for the following:

  • Corrosion
  • Damaged Panels
  • Damaged fasteners or washer seals

While extremely durable, metal roofing systems still require periodic inspections and occasional repairs.

Commercial metal roof with corrosion and damaged seals

Commercial Sloped Roof Inspections

Commercial sloped roofing systems may be composed of slate, metal, tiles, or asphalt shingles. Like other roofing systems, sloped roofs can wear out over time or suffer significant damages from severe weather. For shingled roofs, consider calling a roofer when:

  • Shingles lose grain
  • Shingles start curling

When extensive wear and tear become evident on asphalt shingles, the roofing system may be nearing the end of its lifespan. For tile or slate roofs, pay attention to:

  • Chips and cracks
  • Missing tiles

Tile and slate roofing systems can be hazardous when cracks occur, or other problems arise. Leave these inspections or repairs to a professional roofing company.

Shingles and tiles on a commercial sloped roof

Inspecting a Commercial Roof

In this article, you discovered what to look for during a commercial roof inspection and how to address problems when they arise.

By knowing how to inspect your roof, you can stop minor issues before they develop into expensive problems.

When you neglect taking care of your roof through inspections and a maintenance program, you are risking expensive damages and potential disruption of business activities.

Sources:
inf.gov.nt.ca/sites/inf/files/roof_inspection_checklist.pdf
nachi.org/documents2012/How_to_Perform_Roof_Inspections_THIRD_EDITION-revd-Dec-2013.pdf

The post Commercial Roof Inspection Checklist appeared first on atlantacommercialroofingcontractors.com

Can Roof Shingles Be Painted?

Many property owners wonder whether painting their roof is a viable way to refresh its appearance without the expense of a full replacement....